Introduction
agb is a powerful and easy-to-use library for writing games for the Game Boy Advance (GBA) in rust. It provides an abstracted interface to the hardware, allowing you to take full advantage of its capabilities without needing to know the low-level details of its implementation.
agb provides the following features:
- Simple build process with minimal dependencies
- Built-in importing of sprites, backgrounds, music and sound effects
- High performance audio mixer
- Easy to use sprite and tiled background usage
- A global allocator allowing for use of both
coreandalloc
Why rust?
Rust is an excellent choice of language for developing games on low-level embedded hardware like the GBA. Its strong type system and memory safety are incredibly useful when working with platforms without operating system checks, while the zero cost abstractions and performance optimisations allow you to write expressive code which still performs well.
agb uses rust’s features by using the type system to model the GBA’s hardware.
This approach helps prevent common programming errors and allows you to quickly build games that function correctly and make the limitations of the platform clear.
What is in this book?
This book serves as an introduction to agb, showcasing its capabilities and providing guidance on how to use it to build your own GBA games.
It assumes that you have some experience with rust and game development, and provides tutorials to teach you the basics, along with longer articles diving deeper into specific features.
Who is this book for?
This book is for anyone interested in writing games for the GBA using rust. If you’re new to either rust or game development, you may want to start with some introductory resources before diving into this book. This book assumes a basic understanding of rust syntax and semantics, as well as game development concepts.
Helpful links
- agb’s GitHub is the primary development hub for the library.
- agb’s Discussion Page is a helpful forum where you can ask for help on using agb or share your projects with the community.
- agb’s crates.io page the latest version of the library on crates.io.
- agb’s documentation is a useful reference for the library’s API and features.
- Awesome Game Boy Advance development is a comprehensive resource for GBA development, with links to popular libraries, emulators, and the friendly gbadev Discord server.
- Example games built using agb can be found in the
examples.zipfile attached to the latest release. Additionally, you can also check out this collection of games on itch.io.
The Game Boy Advance hardware
The Game Boy Advance is a handheld gaming console released by Nintendo in March 2001 in Japan and in North America in June of the same year. It features a 2.9 inch screen with a 240x160 pixel resolution and is powered by a 32-bit 16.8MHz ARM CPU. The console was developed as a successor to the Game Boy Color and was internally codenamed the ‘Advanced Game Boy’ (agb), which is where this crate gets its name.
What makes the GBA unique?
The GBA was developed at a time when processors were not powerful enough to push an entire screen of pixels to the screen every frame. As a result, it features a special Pixel Processing Unit (PPU) that is similar to a modern-day graphics card, but is optimized for gaming. The console has a concept of “hardware sprites” and “hardware backgrounds,” which we will explain in more detail in the next section. These hardware 2D capabilities give the GBA its unique characteristics.
Despite being a retro console, the GBA is still compatible with modern tools and programming languages thanks to the ARM CPU it contains. The CPU is modern enough to be supported by LLVM and Rust, which provide a reasonably trouble-free experience. This allows developers to take advantage of modern tooling while experiencing what it was like to program for retro consoles at the time.
The combination of this weak hardware and retro PPU with support of modern tooling makes the GBA fairly unique among retro consoles.
Capabilities of the hardware
The GBA is fundamentally a 2D system, and a lot of the hardware accelerated graphics is designed to support this. The relevant features for this book are:
- 256 sprites which can be from 8x8 to 64x64 pixels in size
- 4 background layers which are enabled / disabled depending on the graphics mode
- Background tiles, 8x8 pixel tiles are used in the background layers if they are in tile mode.
- 8-bit sound. You have the ability to send 8-bit raw audio data to the speakers, optionally stereo.
You can read more about the specifics of the GBA on gbatek.
To simplify the development process, agb abstracts some of the GBA’s hardware away from the developer, which reduces the number of things to remember and lessens the chance of something going wrong.
If you wish to experiment with the hardware directly, the best place to look is tonc.
Running an example
In this section, we will get to the point where you can build and run the agb template repository.
This will prove that your development environment is ready for the future tutorials and later building.
You can run the game using real hardware and a flash card.
However, at this stage, it is much easier to play on an emulator.
agb is guaranteed to work well using mGBA, but other emulators will also work.
Note that some emulators will require a special ‘fixed’ gba ROM file. See the later steps in this section for how to do this.
Environment setup
Environment setup will depend on the platform you are using. You need to install the rust nightly edition along with (optionally) some additional tools.
See the sub-pages here for platform specific setup guides.
Linux setup
This guide has been tested on Ubuntu, Arch Linux and Raspberry Pi OS running on a raspberry pi 4.
1. Install a recent version of rust
To use agb, you’ll need to use nightly rust since it requires a few nightly features. Firstly, ensure that you have rustup installed which you can do by following the instructions on the rust website
If you have already installed rustup, you can update it with rustup update.
2. git
The source code for the game is hosted on github, so you will need to install git.
- On Debian and derivatives (like Ubuntu):
sudo apt install git - On Arch Linux and derivatives:
sudo pacman -S git - On Fedora:
sudo dnf install git
3. mGBA
We recommend using the mGBA emulator, which is available on most distro’s repositories.
- On Debian and derivatives (like Ubuntu):
sudo apt install mgba-qt - On Arch Linux and derivatives:
sudo pacman -S mgba-qt - On Fedora, you can get it from a flatpak
4. gbafix
In order to be able to play games made with agb on real hardware or on some emulators, you will need to install ‘agb-gbafix’.
Agb’s implementation can be installed very easily using cargo install agb-gbafix.
Make sure that the Cargo bin directory is in your PATH as we’ll need to use it later.
That is all you need to get started! You can now move on to ‘building the game’.
Windows setup
This guide has been tested on Windows 11 using PowerShell with elevated rights (don’t use cmd).
1. Install a recent version of rust
To use agb, you’ll need to use nightly rust since it requires a few nightly features. Firstly, ensure that you have rustup installed which you can do by following the instructions on the rust website
If you have installed rustup, you can update it with rustup update.
If the rustup-command fails, you’ll most probably add the cargo/bin folder to the Path-environment variable.
2. git
The source code for the game is hosted on github, so you will need to install git.
You’d need to follow this official github git guide.
3. mGBA
We recommend using the mGBA emulator which you can download from here.
After installing, you can add the binary to your Path-environment variable and create an alias for the agb run command to use.
Creating link for mgba-qt:
New-Item -itemtype hardlink -path "C:\Program Files\mGBA\mgba-qt.exe" -value "C:\Program Files\mGBA\mGBA.exe"
4. gbafix
In order to be able to play games made with agb on real hardware or on some emulators, you will need to install ‘agb-gbafix’.
Agb’s implementation can be installed very easily using cargo install agb-gbafix.
That is all you need to get started! You can now move on to ‘building the game’.
Mac setup
This guide has been tested on MacOS 13.0.1 on an M1 chip.
1. Install a recent version of rust
To use agb, you’ll need to use nightly rust since it requires a few nightly features. Firstly, ensure that you have rustup installed which you can do by following the instructions on the rust website
If you have already installed rustup, you can update it with rustup update.
2. Get git
The source code for the game is hosted on github, so you will need git installed. Follow the instructions at git-scm.com
3. GBA Emulator - mGBA
We recommend using the mGBA emulator which you can download for Mac here.
After installing to your /Applications folder you can add the binary to your path and create an alias for the agb run command to use.
- Add
/Applications/mGBA.app/Contents/MacOSto/etc/paths - Inside the
/Applications/mGBA.app/Contents/MacOSdirectory (in a terminal) run:ln -s mGBA mgba-qt
4. Real hardware - gbafix
In order to be able to play games made with agb on real hardware or on some emulators, you will need to install ‘agb-gbafix’.
Agb’s implementation can be installed very easily using cargo install agb-gbafix.
Make sure that the Cargo bin directory is in your PATH as we’ll need to use it later.
That is all you need to get started! You can now move on to ‘building the game’.
Building and running the agb template
In this section, you will learn how to build and run the agb template.
By the end of this section, you will have a working GBA game that you can run on your emulator of choice.
1. Clone the repository
The first step is to clone the agb template repository using Git. Open a terminal or command prompt and run the following command:
git clone https://github.com/agbrs/template.git
This will create a copy of the agb template repository on your local machine.
2. Build the template
Next, navigate to the template directory in the repository and build the template using the following command:
cd template
cargo build --release
This command will compile the agb template in release mode.
The resulting binary file can be found in the target/thumbv4t-none-eabi/release directory.
Depending on your platform, the file will have either a .elf extension or no extension.
This command will add the correct GBA header to the template.gba file and it will be playable on real hardware or an emulator.
3. Run the game
If you have mgba-qt installed on your machine, you can run the game directly from the command line using the following command:
cargo run --release
This will build and run the agb template in a single step.
4. Convert the binary to a GBA file
In order to build the game for releasing it, you will need to create a GBA file.
To do this, we’ll use the tool agb-gbafix.
Run the following command to convert the binary file to a GBA ROM:
agb-gbafix target/thumbv4t-none-eabi/release/agb_template -o agb_template.gba
or
agb-gbafix target/thumbv4t-none-eabi/release/agb_template.elf -o agb_template.gba
You can use this GBA file in an emulator or on real hardware
Learn agb part I: Pong
In this section, you’ll learn how to make a simple pong-style game for the Game Boy Advance using agb. By following the steps in this section below, you’ll gain an understanding of:
- How to use tiled graphics modes.
- How to import graphics using
agb. - What Game Boy Advance sprites are, how to create them, and how to display them on the screen.
- How to detect button input and use it to control game objects.
- How to add a static background to your game.
- How to make a dynamic background to display scores.
- How to add music and sound effects to your game.
With this knowledge, you’ll be well equipped to start making your own games for the GBA!
Getting started
To get started, create a new repository based on the agb template and name it pong.
Next, update the name field in Cargo.toml to pong like so:
[package]
name = "pong"
version = "0.1.0"
authors = ["Your name here"]
edition = "2024"

# ...
Now, you’re ready to dive and and start learning about agb!
The Gba struct
In this section, we’ll cover the importance of the Gba struct and how it gets created for you.
The importance of the Gba struct
The Gba singleton struct is a crucial part of agb game development.
It is used for almost all interactions with the Game Boy Advance’s hardware, such as graphics rendering, timer access and audio playback.
You should not create the Gba struct yourself.
Instead, it is passed to your main function as an owned reference.
This allows rust’s borrow checker to ensure that access to the Game Boy Advance hardware is done in a safe and sensible manner, preventing two bits of your code from modifying data in the wrong way.
How all agb games start
To use the Gba struct in your agb game, you’ll need to create a function (normally called main).
You should then annotate that function with the #[agb::entry] attribute macro provided by the agb crate.
Replace the content of the main function with the following:
// infinite loop for now
loop {
    agb::halt();
}
This creates an infinite loop and allows you to start building your game.
We use the agb::halt to save some battery life on the console while the infinite loop is happening.
Running your pong game
At this point, your game won’t do much except display a black screen. To run your game, use the cargo run command as before.
What we covered
In this section, we covered the importance of the Gba struct in agb game development.
By using the Gba struct as a gatekeeper for all hardware interactions, you can ensure that your code is safe and efficient.
You are now ready to learn about sprites and start getting things onto the screen!
Sprites
In this section, we’ll cover what sprites are in the Game Boy Advance and how to put them on the screen in our pong game. We’ll briefly cover vblank, and by the end of this section, you’ll have a ball bouncing around the screen!
Why do we need sprites?
The Game Boy Advance has a 240x160px screen with 15-bit RGB color support. Setting the color for each pixel manually would require updating 38,400 pixels per frame, or 2,304,000 pixels per second at 60 fps. With a 16 MHz processor, this means calculating 1 pixel every 8 clock cycles, which is pretty much impossible. The Game Boy Advance provides two ways to easily put pixels on the screen: backgrounds and sprites.
Backgrounds are made of tiles which are 8x8 pixels in size and can be placed in a grid on the screen. You can also scroll the whole background to arbitrary positions, but the tiles themselves will remain in this 8x8 pixel grid.
Sprites are the other way to draw things on the screen, which we’ll cover in this section. The Game Boy Advance supports 128 hardware sprites, with different sizes ranging from square 8x8 to more exotic sizes like 8x32 pixels. In our pong game, all the sprites will be 16x16 pixels to make things simpler.
There are technically two types of sprites: regular and affine sprites. For now, we will only be dealing with regular sprites.
Import the sprite
Firstly, you’re going to need to import the sprites into your project.
agb requires the use of aseprite sprite editor which can be bought for $20 or you can compile it yourself for free.
Aseprite files can be natively imported by agb.
Below is the sprite sheet we will use as a png, but you should download the aseprite file and place it in gfx/sprites.aseprite.
The file contains 5 16x16px sprites: the end cap for the paddle, the center part of the paddle, which could potentially be repeated a few times, and the ball with various squashed states.
The aseprite file defines tags for these sprites: “Paddle End”, “Paddle Mid”, and “Ball”.
Use the include_aseprite macro to include the sprites in the given aseprite file.
use agb::include_aseprite;

// Import the sprites in to this static. This holds the sprite
// and palette data in a way that is manageable by agb.
include_aseprite!(
    mod sprites,
    "gfx/sprites.aseprite"
);
This creates a module called sprites which will contain an entry for each tag defined in the aseprite file, converted to UPPER_CASE.
To display this on screen, we need to create an Object and call its .show() method.
To show anything to the screen with agb, you do this via the GraphicsFrame struct which you create using Graphics.
The Gba struct passed to your main function ensures that you can only have one Graphics object at a time, which makes it impossible to incorrectly handle the frame.
use agb::display::object::Object;

#[agb::entry]
fn main(mut gba: agb::Gba) -> ! {
    // Get the graphics manager, responsible for all the graphics
    let mut gfx = gba.graphics.get();

    // Create an object with the ball sprite
    let mut ball = Object::new(sprites::BALL.sprite(0));

    // Place this at some point on the screen, (50, 50) for example
    ball.set_pos((50, 50));

    // Start a frame and add the one object to it
    let mut frame = gfx.frame();

    // Actually show this object on the screen
    ball.show(&mut frame);

    // Until the call to `frame.commit()`, nothing will be displayed
    frame.commit();

    loop {
        agb::halt();
    }
}
When you run this you should now see the ball for this pong game somewhere in the top left of the screen, with a black background.
Making the sprite move
The GBA renders to the screen one pixel at a time a line at a time from left to right, top to bottom.
After it has finished rendering to each pixel of the screen, it briefly pauses rendering before starting again.
This period of no drawing is called the ‘vertical blanking interval’ which is shortened to vblank.
There is also a ‘horizontal blanking interval’, but that is outside of the scope of this tutorial1.
The frame.commit() method automatically waits for this vblank state before rendering your sprites to avoid moving a sprite while it is being rendered which could cause tearing of your objects.
Making the sprite move 1 pixel every frame (so 60 pixels per second) can be done as follows:
// replace the loop with this

let mut ball_x = 50;
let mut ball_y = 50;
let mut x_velocity = 1;
let mut y_velocity = 1;

loop {
    // This will calculate the new position and enforce the position
    // of the ball remains within the screen
    ball_x = (ball_x + x_velocity).clamp(0, agb::display::WIDTH - 16);
    ball_y = (ball_y + y_velocity).clamp(0, agb::display::HEIGHT - 16);

    // We check if the ball reaches the edge of the screen and reverse it's direction
    if ball_x == 0 || ball_x == agb::display::WIDTH - 16 {
        x_velocity = -x_velocity;
    }

    if ball_y == 0 || ball_y == agb::display::HEIGHT - 16 {
        y_velocity = -y_velocity;
    }

    // Set the position of the ball to match our new calculated position
    ball.set_pos((ball_x, ball_y));

    // prepare the frame
    let mut frame = gfx.frame();
    ball.show(&mut frame);

    frame.commit();
}
What we did
In this section, we covered why sprites are important, how to create and manage them using the Frame in agb and made a ball bounce around the screen.
-
Timing this can give you some really cool effects allowing you to push the hardware.
agbprovides support for this by usingdma, this is an advanced technique that is out of scope of this tutorial. ↩
Meta Sprites
In this section we’ll discuss how the GBA’s concept on sprites and objects doesn’t need to correspond to your game’s concept of objects and we will make the paddle display on screen.
What is a meta sprite?
Imagine all you had were 8x8 pixel sprites, but you wanted an enemy to be 16x16 pixels. You could use 4 sprites in a square arrangement to achieve this. Using multiple of these GBA objects to form one of your game objects is what we call a meta sprite.
Making the paddle
In the paddle sprite we gave you a “Paddle End” and a “Paddle Mid”. Therefore in order to show a full paddle we will need 2 paddle ends with a paddle mid between them.
Let’s just write that and we’ll get to neatening it up later.
// outside the game loop
let mut paddle_start = Object::new(sprites::PADDLE_END.sprite(0));
let mut paddle_mid = Object::new(sprites::PADDLE_MID.sprite(0));
let mut paddle_end = Object::new(sprites::PADDLE_END.sprite(0));

paddle_start.set_pos((20, 20));
paddle_mid.set_pos((20, 20 + 16));
paddle_end.set_pos((20, 20 + 16 * 2));
If you add this to your program and show() all of them, you’ll see the paddle. But wait! The bottom of
the paddle is the wrong way around! Fortunately, the GBA can horizontally and vertically flip sprites.
paddle_end.set_vflip(true);Now the paddle will display correctly. It’s rather awkward to use, however, having to set all these positions correctly. Therefore we should encapsulate the logic of this object.
pub struct Paddle {
    x: i32,
    y: i32,
}

impl Paddle {
    pub fn new(start_x: i32, start_y: i32) -> Self {
        Self {
            x: start_x,
            y: start_y,
        }
    }

    pub fn set_pos(&mut self, x: i32, y: i32) {
        self.x = x;
        self.y = y;
    }

    pub fn show(&self, frame: &mut GraphicsFrame) {
        Object::new(sprites::PADDLE_END.sprite(0))
            .set_pos((self.x, self.y))
            .show(frame);
        Object::new(sprites::PADDLE_MID.sprite(0))
            .set_pos((self.x, self.y + 16))
            .show(frame);
        Object::new(sprites::PADDLE_END.sprite(0))
            .set_pos((self.x, self.y + 32))
            .set_vflip(true)
            .show(frame);
    }
}
Here we’ve made a struct to hold our paddle objects and added a convenient
new, set_pos, and show function and methods to help us use it. Now we
can easily create two paddles (one on each side of the screen).
// outside the loop
let mut paddle_a = Paddle::new(8, 8); // the left paddle
let mut paddle_b = Paddle::new(240 - 16 - 8, 8); // the right paddle
What we did
We used multiple sprites to form one game object of a paddle. We also added convenience around the use of the paddle to make creating a paddle and setting its position easy.
In the next section, we’ll allow the player paddle to move around.
Exercise
The paddle on the right is facing the wrong way, it needs to be horizontally
flipped! Given that the method is called set_hflip, can you modify the code
such that both paddles face the correct direction.
Paddle movement
So far we have a static game that you can’t interact with. In this section, we’ll make the paddle move while pressing the D-Pad.
The GBA controls
The GBA has 10 buttons we can read the state of, and this is the only way a player can directly control the game. They are the 4 directions on the D-Pad, A, B, Start, Select, and the L and R triggers.
On a standard QWERTY keyboard, the default configuration on mGBA is as follows:
| GBA button | mGBA |
|---|---|
| D-pad | Arrow keys |
| A | X |
| B | Z |
| Start | Enter |
| Select | Backspace |
| L trigger | A |
| R trigger | S |
Reading the button state
To add button control to our game, we will need a ButtonController.
Add this near the top of your main function:
let mut button_controller = agb::input::ButtonController::new();The button controller is not part of the Gba struct because it only allows for reading and not writing so does not need to be controlled by the borrow checker.
At the start of the loop, you should update the button state with:
button_controller.update();To handle the movement of the paddles, let’s add a new method to the Paddle struct.
pub fn move_by(&mut self, y: i32) {
    self.y += y;
}
You can use the y_tri() method to get the current state of the up-down buttons on the D-Pad.
It returns an instance of the Tri enum which describes which buttons are being pressed, and are very helpful in situations like these where you want to move something in a cardinal direction based on which buttons are pressed.
Add the following code after the call to button_controller.update().
paddle_a.move_by(button_controller.y_tri() as i32);You will have to mark paddle_a as mut for this to compile.
What we did
We’ve learned about how to handle button input in agb and you can now move the player paddle!
In the next section, we’ll add some collision between the ball and the paddles.
Exercise
Add a power-up which moves the player at twice the speed while pressing the A button by using the is_pressed() method.
Paddle movement and collision
In this section we’ll implement collision between the ball and the paddles to start having an actual game.
Using Vector2D<i32>
However, the first thing we’re going to do is a quick refactor to using agb’s Vector2D
type for managing positions more easily.
Note that this is the mathematical definition of ‘vector’ rather than the computer science dynamic array.
Vector2D for the ball position and velocity
We’re currently storing the ball’s x and y coordinate as 2 separate variables, along with it’s velocity. Let’s change that first.
Change ball position to:
let mut ball_pos = vec2(50, 50);
let mut ball_velocity = vec2(1, 1);
You will also need to add the relevant import line to the start of the file. Which will be:
use agb::fixnum::{Vector2D, vec2};Note that the vec2 method is a convenience method which is the same as Vector2D::new() but shorter.
You can now simplify the calculation:
// Move the ball
ball_pos += ball_velocity;

// We check if the ball reaches the edge of the screen and reverse it's direction
if ball_pos.x <= 0 || ball_pos.x >= agb::display::WIDTH - 16 {
    ball_velocity.x *= -1;
}

if ball_pos.y <= 0 || ball_pos.y >= agb::display::HEIGHT - 16 {
    ball_velocity.y *= -1;
}

// Set the position of the ball to match our new calculated position
ball.set_pos(ball_pos);
Vector2D for the paddle position
You can store the paddle position as pos instead of x and y separately:
pub struct Paddle {
    pos: Vector2D<i32>,
}
You can change the set_pos() method on Paddle to take a Vector2D<i32> instead of separate x and y arguments as follows:
pub fn set_pos(&mut self, pos: Vector2D<i32>) {
    self.pos = pos;
}
And when rendering:
pub fn show(frame: &mut GraphicsFrame) {
    Object::new(sprites::PADDLE_END.sprite(0))
        .set_pos(self.pos)
        .show(frame);
    Object::new(sprites::PADDLE_MID.sprite(0))
        .set_pos(self.pos + vec2(0, 16))
        .show(frame);
    Object::new(sprites::PADDLE_END.sprite(0))
        .set_pos(self.pos + vec2(0, 32))
        .set_vflip(true)
        .show(frame);
}
move_by() can also be updated as follows:
pub fn move_by(&mut self, y: i32) {
    self.pos += vec2(0, y);
}
Mini exercise
You will also need to update the new() function and the calls to Paddle::new.
Collision handling
We now want to handle collision between the paddle and the ball. We will assume that the ball and the paddle both have axis-aligned bounding boxes, which will make collision checks very easy.
agb’s fixnum library provides a Rect type which will allow us to detect this collision.
Lets add a simple method to the Paddle impl which returns the collision rectangle for it:
pub fn collision_rect(&self) -> Rect<i32> {
    rect(self.pos, vec2(16, 16 * 3))
}
Don’t forget to update the use statement:
use agb::fixnum::{Rect, Vector2D, rect, vec2};And then we can get the ball’s collision rectangle in a similar way. We can now implement collision between the ball and the paddle like so:
// Speculatively move the ball, we'll update the velocity if this causes it to
// intersect with either the edge of the map or a paddle.
let potential_ball_pos = ball_pos + ball_velocity;

let ball_rect = rect(potential_ball_pos, vec2(16, 16));
if paddle_a.collision_rect().touches(ball_rect) {
    ball_velocity.x = 1;
}

if paddle_b.collision_rect().touches(ball_rect) {
    ball_velocity.x = -1;
}

// We check if the ball reaches the edge of the screen and reverse it's direction
if potential_ball_pos.x <= 0 || potential_ball_pos.x >= agb::display::WIDTH - 16 {
    ball_velocity.x *= -1;
}

if potential_ball_pos.y <= 0 || potential_ball_pos.y >= agb::display::HEIGHT - 16 {
    ball_velocity.y *= -1;
}

ball_pos += ball_velocity;
This now gives us collision between the paddles and the ball.
What we did
We’ve refactored the code a little to use Rect and Vector2D which simplifies some of the code.
We’ve also now got collision handling between the paddle and the ball, which will set us up for paddle movement in the next section.
Exercise
The CPU player could do with some moving now. Implement some basic behaviour for them so that they try to return the ball.
Backgrounds
In addition to sprites, the GBA can also display up to 4 different background layers. These can be used for various things, but the main use case for backgrounds are backdrops for the game (hence the name background) and UI elements.
These backgrounds can be stacked on top of each other to create parallax effects, or to add a Heads Up Display (HUD) above the backdrop.
In this pong example, we’re going to show a static background behind the play screen to make everything look a little more exciting.
What are backgrounds?
A background on the GBA is a layer made up of 8x8 tiles. Like Objects, there are 2 kinds of backgrounds: regular and affine. We’ll stick to regular backgrounds in this tutorial.
Regular backgrounds can display tiles in one of 2 modes. 16-colour mode and 256-colour mode. In 16-colour mode, each tile is assigned a single 16-colour palette from one of 16 possible palettes. In 256-colour mode, each tile can use any one of the 256 colours in the palette.
16-colour mode uses half the video RAM and half the space on the cartridge, so most games will use 16-colour tiles where possible (and we will do the same in this tutorial). This is because it uses 4 bits per pixel of tile data vs. the 8 bits per pixel in 256 colour mode.
Organising the palettes so that you can display your background in one go is handled by agb, and is not something you need to worry about.
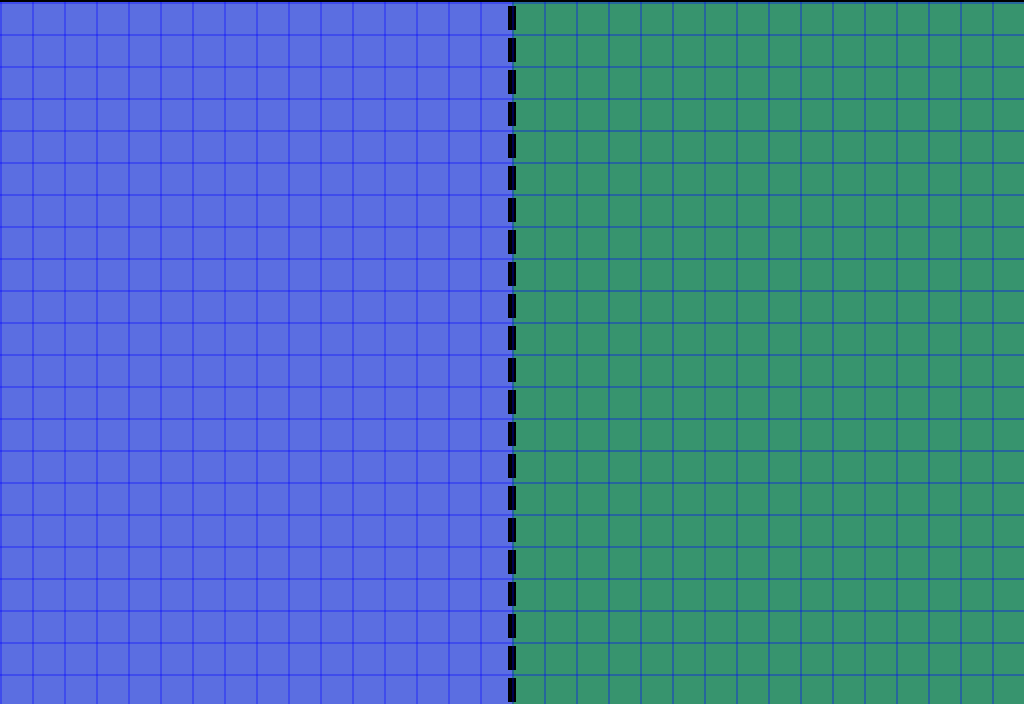
Above is a background with the tile lines marked out. This will be the background we put on the pong game. In this case, we will be using the background as the backdrop for our game. But they can also be used for other purposes like heads up displays (HUDs) to be drawn in front of the player sprite, or to render text onto.
Backgrounds can be scrolled around if needed to allow for easy scrolling levels. We won’t need that in our pong game though.
Importing backgrounds
Firstly we’ll need the aseprite file for the background, which you can get from here.
Put this in gfx/background.aseprite.
Backgrounds are imported using the include_background_gfx! macro.
use agb::include_background_gfx;

include_background_gfx!(
    mod background,
    PLAY_FIELD => deduplicate "gfx/background.aseprite",
);
The first argument is the name of the module you want created to hold the background data. The second maps names of static variables within that module to files you want it to import.
agb will automatically create palettes which cover every colour used by tiles, and the deduplicate option will merge duplicate tiles.
The playing field has a lot of duplicate tiles, so adding the deduplicate option in this case reduces our tile count from 600 to 4.
Displaying backgrounds
To show the background on the screen, you’ll need to do 3 things:
1. Register the palettes
The palettes will need registering which you do with a call to gfx.set_background_palettes().
// near the top of main()
gfx.set_background_palettes(background::PALETTES);
2. Creating the background tiles
Create a RegularBackground to store the actual tiles.
use agb::display::{
    Priority,
    tiled::{RegularBackground, RegularBackgroundSize, TileFormat},
};

let mut bg = RegularBackground::new(
    Priority::P3,
    RegularBackgroundSize::Background32x32,
    TileFormat::FourBpp
);

bg.fill_with(&background::PLAY_FIELD);
Since we’ve imported our tiles in 16-colour mode (or 4 bits per pixel), we state TileFormat::FourBpp as the colour format.
For priority, we’ve opted for Priority::P3
This will mean that it is rendered below every background, and below any objects.
3. Showing the tiles
Just before the call to frame.commit(), call bg.show().
bg.show(&mut frame);
frame.commit();
What we did
You should now have a background to the pong game which makes it look way better. Next we’ll look at fixnums and how they can make the game feel a little less flat.
Exercise
Take a look at the 256 colour mode for importing backgrounds and displaying them.
Change the background to use those instead.
Hint: look at the options in include_background_gfx!, and consider the TileFormat.
What are the advantages and disadvantages of using 256 colour mode? Why would you pick it over 16 colour mode?
Fixnums
Currently the gameplay of our pong game is a little un-exciting. Part of this reason is that the ball is always moving at a 45° angle. However, it is currently moving at 1 pixel per frame in the horizontal and vertical directions. So to move at a different angle without making the game run too fast for us to be able to react, we need to make it move at less than 1 pixel per frame.
You may want to reach out to floating point numbers to do this, but on the Game Boy Advance, this is a big problem.
The Game Boy Advance doesn’t have a floating point unit, so all work with floating point numbers is done in software, which is really slow, especially on the 16MHz processor of the console. Even simple operations, like addition of two floating point numbers will take 100s of CPU cycles, so ideally we’d avoid needing to use that.
The solution to this problem used by almost every Game Boy Advance game is to use ‘fixed point numbers’ rather than floating point numbers.
Preliminary refactor
Before we go to put fixed point numbers in the game, we need to do a quick change to pull the ball into its own struct.
pub struct Ball {
    pos: Vector2D<i32>,
    velocity: Vector2D<i32>,
}

impl Ball {
    pub fn new(pos: Vector2D<i32>, velocity: Vector2D<i32>) -> Self {
        Self { pos, velocity }
    }

    pub fn update(&mut self, paddle_a: &Paddle, paddle_b: &Paddle) {
        // Speculatively move the ball, we'll update the velocity if this causes it to intersect with either the
        // edge of the map or a paddle.
        let potential_ball_pos = self.pos + self.velocity;

        let ball_rect = rect(potential_ball_pos, vec2(16, 16));
        if paddle_a.collision_rect().touches(ball_rect) {
            self.velocity.x = 1;
        }

        if paddle_b.collision_rect().touches(ball_rect) {
            self.velocity.x = -1;
        }

        // We check if the ball reaches the edge of the screen and reverse it's direction
        if potential_ball_pos.x <= 0 || potential_ball_pos.x >= agb::display::WIDTH - 16 {
            self.velocity.x *= -1;
        }

        if potential_ball_pos.y <= 0 || potential_ball_pos.y >= agb::display::HEIGHT - 16 {
            self.velocity.y *= -1;
        }

        self.pos += self.velocity;
    }

    pub fn show(&self, frame: &mut GraphicsFrame) {
        Object::new(sprites::BALL.sprite(0))
            .set_pos(self.pos)
            .show(frame);
    }
}
Then replace all the ball related code outside of the loop with
let mut ball = Ball::new(vec2(50, 50), vec2(1, 1));and the collision handling code can be replaced with
ball.update(&paddle_a, &paddle_b);Since we’ve kept the .show() pattern, you don’t need to update the call to ball.show().
Using fixnums
Fixed point numbers (fixnums) store a fixed number of bits for the fractional part of the number, rather than how floating point numbers are stored. This allows for very fast addition and multiplication, but you can’t store very large or very small numbers any more.
Let’s first swap all of the positions with a fixed point number. Firstly, we’ll define a type for our fixed point numbers for this game:
use agb::fixnum::{Num, num};

type Fixed = Num<i32, 8>;
Num<i32, 8> means we’ll store 8 bits of precision
(allowing for up to 256 values between each integer value) with an underlying integer type of i32.
This is a pretty good default to use for most fixed number usage in the Game Boy Advance, since it strikes a pretty good balance between being reasonably precise, while giving a pretty good range of possible maximum and minimum values.
Also, the Game Boy Advance is a 32-bit platform, so is optimised for 32-bit arithmetic operations.
Adding and subtracting with 32-bit values is often faster than working with 16-bit values.
We’ll now replace the paddle position and the ball position and velocity with Fixed instead of i32, fixing compiler errors as you go.
Some notable changes:
pub fn move_by(&mut self, y: Fixed) {
    // we now need to cast the 0 to a Fixed which you can do with
    // `Fixed::from(0)` or `0.into()`. But the preferred one is the `num!` macro
    // which we imported above.
    self.pos += vec2(num!(0), y);
}

pub fn collision_rect(&self) -> Rect<Fixed> {
    // Same idea here with creating a fixed point rectangle
    rect(self.pos, vec2(num!(16), num!(16 * 3)))
}
Since you can only show things on the Game Boy Advance’s screen in whole pixel coordinates, you’ll need to convert the fixed number to an integer to show the paddle in a specific location:
pub fn show(&self, frame: &mut GraphicsFrame) {
    let sprite_pos = self.pos.round();

    Object::new(sprites::PADDLE_END.sprite(0))
        .set_pos(sprite_pos)
        .show(frame);
    Object::new(sprites::PADDLE_MID.sprite(0))
        .set_pos(sprite_pos + vec2(0, 16))
        .show(frame);
    Object::new(sprites::PADDLE_END.sprite(0))
        .set_pos(sprite_pos + vec2(0, 32))
        .set_vflip(true)
        .show(frame);
}
It is best to use .round() rather than .floor() for converting from fixnums back to integers because it works better when approaching integer locations (which becomes more relevant if you add some smooth animations in future).
The call to paddle_a.move_by() needs updating using Fixed::from(...) rather than num!(...) because the num!() macro requires a constant value.
Once you’ve done all these changes and the code now compiles, if you run the game, it will be exactly the same as before. However, we’ll now take advantage of those fixed point numbers.
More dynamic movement
Let’s first make the ball move less vertically by setting the initial ball velocity to 0.5.
let mut ball = Ball::new(vec2(num!(50), num!(50)), vec2(num!(1), num!(0.5)));But now it feels a bit slow, so maybe increase the horizontal speed a little as well to maybe 2.
Now we notice that the paddle collision sets the horizontal speed component to 1, so update that:
if paddle_a.collision_rect().touches(ball_rect) {
    self.velocity.x = self.velocity.x.abs();
}

if paddle_b.collision_rect().touches(ball_rect) {
    self.velocity.x = -self.velocity.x.abs();
}
And finally, to make it slightly more exciting, let’s alter the y component depending on where the hit happened by putting this
inside the if statement where we handle the collision.
let y_difference = (ball_rect.centre().y - paddle_a.collision_rect().centre().y) / 32;
self.velocity.y += y_difference;
And something similar for the paddle_b case.
Now the game feels a lot more dynamic where the game changes depending on where you hit the ball.
What we did
We learned the basics of using fixed point numbers, and made the game feel more interesting by making the ball movement depend on how you hit it. Next we’ll add some sound effects and background music to make the game feel a bit more dynamic.
Exercise
Change the velocity calculations to instead change the angle but keep the speed the same. Then make the ball speed up a bit after each hit so that eventually you won’t be able to always return the ball.
See also
Background music
In this section we’re going to add some music and sound effects to the game to make it feel more alive.
First we’ll put some sound effects when the ball hits a paddle, and then we’ll add some background music.
Audio in agb
In agb, audio is managed through the Mixer.
Create a mixer from the Gba struct, passing through the frequency you intend to use.
For this section, we’ll use 32768Hz.
Get yourself a mixer by adding this near the beginning of your main function.
use agb::sound::mixer::Frequency;

let mut mixer = gba.mixer.mixer(Frequency::Hz32768);
In order to update the mixer and keep it playing audio constantly without skipping, you need to call the
mixer.frame() method every frame.
It is best to call this right before frame.commit().
So let’s do this now and add:
mixer.frame(); // new code here
frame.commit();
Generating the wav files
agb can only play wav files.
You can download the file from here, or generate the same sound yourself on sfxr.
The final file should go in the sfx directory in your game.
The file must be a 32768Hz wav file.
Any other frequency will result in the sound being played at a different speed than what you would expect.
You can use ffmpeg to convert to a file with the correct frequency with a command similar to this:
ffmpeg -i ~/Downloads/laserShoot.wav -ar 32768 sfx/ball-paddle-hit.wav
Importing the sound effect
Import the wav file using include_wav!().
use agb::{include_wav, sound::mixer::SoundData};

static BALL_PADDLE_HIT: SoundData = include_wav!("sfx/ball-paddle-hit.wav");
Playing the sound effect
To play a sound effect, you need to create a SoundChannel.
use agb::sound::mixer::SoundChannel;

let hit_sound = SoundChannel::new(BALL_PADDLE_HIT);
mixer.play_sound(hit_sound);
We’ll do this in a separate function:
use agb::sound::mixer::{Mixer, SoundChannel};

fn play_hit(mixer: &mut Mixer) {
    let hit_sound = SoundChannel::new(BALL_PADDLE_HIT);
    mixer.play_sound(hit_sound);
}
and add the play_hit(&mut mixer) call where you handle the ball paddle hits.
Background music
Because the GBA doesn’t have much spare CPU to use, we can’t store compressed audio as background music and instead have to store it as uncompressed. Uncompressed music takes up a lot of space, and the maximum cartridge size is only 32MB, so that’s as much as you can use.
Therefore, most commercial games for the GBA use tracker music for the background music instead. These work like MIDI files, where rather than storing the whole piece, you instead store the instruments and which notes to play and when. With this, you can reduce the size of the final ROM dramatically.
Composing tracker music is a topic of itself, but you can use the example here for this example.
Copy this to sfx/bgm.xm and we’ll see how to play this using agb.
Firstly you’ll need to add another crate, agb-tracker.
cargo add agb_tracker
Then import the file:
use agb_tracker::{Track, include_xm};

static BGM: Track = include_xm!("sfx/bgm.xm");
You can create the tracker near where you enable the mixer:
use agb_tracker::Tracker;

let mut tracker = Tracker::new(&BGM);
and then to actually play the tracker, every frame you need to call .step(&mut mixer).
So put the call to tracker.step() above the call to mixer.frame()
tracker.step(&mut mixer);
mixer.frame();
You will now have background music playing.
What we did
We’ve now got some sound effects playing when the ball hits the paddle, and some background music playing. Next we’ll add score tracking and finish off the game.
Exercise
Add a new sound effect for when the ball hits the wall rather than a paddle.
Keeping score
We have most of a game, but we should now show the scores of the players. There is one main question when wanting to display anything to the screen on the Game Boy Advance: should you use backgrounds or objects?
There are advantages and disadvantages to each. For backgrounds, there are at most 4 on screen at once, so you need to be careful with the layering of your game to make sure you don’t run out. With objects, you can have at most 128 of them on the screen. But each unique object requires some video RAM to store the graphics information, and that doesn’t have space for 128 large sprites. Backgrounds can be scrolled to an arbitrary location, but multiple items on a single background will be offset by the same value. With objects, you can put them anywhere you want on the screen.
For our pong game, we’ll make the bad decision of displaying the player’s score using backgrounds, and the CPU’s score using objects so you can get a feel of doing both.
You’ll notice that in both cases we’re not using a text rendering system for rendering the text.
This is intentional, it can be quite complicated and CPU intensive to render text, so it is often left for things which have to be dynamic or translatable.
And for this example, it’s not worth learning how to render text yet with agb.
Please refer to the text rendering deep-dive if you’re interested in text rendering after you’ve finished this section.
How the score will work in our pong game
We’ll implement a simple 3 life system. This will be displayed using a heart icon in the top of the screen which becomes an outline after each loss. If you lose while you have 0 lives, you lose the game.
Tracking score
Firstly, let’s add the score to the Paddle objects:
pub struct Paddle {
    pos: Vector2D<Fixed>,
    health: i32,
}
and in the new() function, initialise it to 3.
We’re going to use it for displaying the health as hearts and decrementing it when ball touches the side of the screen. Add these functions to Paddle struct.
pub fn health(&self) -> i32 {
    self.health
}

pub fn decrement_health(&mut self) {
    self.health -= 1;
}
We can then reduce the health in the ball’s update function (you’ll have to change the update function to take &mut Paddle):
if potential_ball_pos.x <= num!(0) {
    self.velocity.x *= -1;
    paddle_a.decrement_health();
} else if potential_ball_pos.x >= num!(agb::display::WIDTH - 16) {
    self.velocity.x *= -1;
    paddle_b.decrement_health();
}
The player’s score (backgrounds)
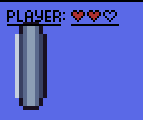
We’ll use the player-health.aseprite file for the assets here. In this section, you’ll get something similar to to what’s shown on the right.
With the tiles marked, it looks as follows:

Static setup
Since we want the player’s score to be displayed above the backdrop of the game, we can import the new tiles and make them available by adding them to the include_background_gfx!() call:
include_background_gfx!(
    mod background,
    PLAY_FIELD => deduplicate "gfx/background.aseprite",
    SCORE => deduplicate "gfx/player-health.aseprite",
);
With these tiles imported, we now need to create a new background to store the player details. So next to where the current background gets created, create the player health background
let mut player_health_background = RegularBackground::new(
    Priority::P0,
    RegularBackgroundSize::Background32x32,
    TileFormat::FourBpp,
);
We’ll create it with priority 0 because we want it displayed above everything.
The first 4 tiles in the background are the word PLAYER:, so we’ll render those to the screen as follows:
for i in 0..4 {
    player_health_background.set_tile(
        (i, 0),
        &background::SCORE.tiles,
        background::SCORE.tile_settings[i as usize],
    );
}
And just below the call to bg.show(&mut frame), also call player_health_background.show(&mut frame).
If you run this, you’ll see the PLAYER: text appear in the top left of the screen.
Ideally we’d want a bit of padding, so let’s scroll the top left of the background a little to show pad it out by 4px.
player_health_background.set_scroll_pos((-4, -4));The offset is negative, because the scroll pos is where to put the top left of the Game Boy Advance’s screen. By offsetting it by -4px, it will move the background 4px right and down.
You’ll also notice however that all the sprites are being rendered above the text.
This is because if an object and a background have the same priority, then the object will be displayed above the background.
So we need to lower the priority of the objects which we can do with the .set_priority() call.
Priority P1 is a sensible option for these objects, so we’ll do that for the ball and the paddle.
Object::new(sprites::BALL.sprite(0))
    .set_pos(self.pos.round())
    .set_priority(Priority::P1)
    .show(frame);
And similarly for the 3 paddle sprites.
Dynamic setup
Now we’ll want to display the actual score.
The full heart is in tile index 4, and the empty one is in tile index 5.
So let’s display up to 3 hearts with the given tile indexes by placing the following code after the ball.update() function call.
for i in 0..3 {
    let tile_index = if i < paddle_a.health() { 4 } else { 5 };
    player_health_background.set_tile(
        (i + 4, 0),
        &background::SCORE.tiles,
        background::SCORE.tile_settings[tile_index],
    );
}
This will put the correct number of hearts on the player’s side.
The CPU’s score (objects)
Download the cpu-health.aseprite file and add it to your gfx folder.
For the CPU’s score, we’ll use objects to display the current health remaining. You can import the sprites in the same way as the existing ones are imported. However, these sprites are 8x8 rather than 16x16, so can’t be in the same aseprite file, but they can be imported together meaning their palettes will be optimised together:
include_aseprite!(
    mod sprites,
    "gfx/sprites.aseprite",
    "gfx/cpu-health.aseprite",
);
For this, both the CPU “text” itself (not to be confused with actual text rendering) as well as the CPU’s hearts are both spread across 2 frames in the aseprite file.
Passing the frame index to the sprite() function gives us the desired combined sprite.
fn show_cpu_health(paddle: &Paddle, frame: &mut GraphicsFrame) {
    // The text CPU: ends at exactly the edge of the sprite (which the player text doesn't).
    // so we add a 3 pixel gap between the text and the start of the hearts to make it look a bit nicer.
    const TEXT_HEART_GAP: i32 = 3;

    // The top left of the CPU health. The text is 2 tiles wide and the hearts are 3.
    // We also offset the y value by 4 pixels to keep it from the edge of the screen.
    //
    // Width is in `agb::display::WIDTH` and is the width of the screen in pixels.
    let top_left = vec2(WIDTH - 4 - (2 + 3) * 8 - TEXT_HEART_GAP, 4);

    // Display the text `CPU:`
    Object::new(sprites::CPU.sprite(0))
        .set_pos(top_left)
        .show(frame);
    Object::new(sprites::CPU.sprite(1))
        .set_pos(top_left + vec2(8, 0))
        .show(frame);

    // For each heart frame, show that too
    for i in 0..3 {
        let heart_frame = if i < paddle.health() { 0 } else { 1 };

        Object::new(sprites::HEART.sprite(heart_frame))
            .set_pos(top_left + vec2(16 + i * 8 + TEXT_HEART_GAP, 0))
            .show(frame);
    }
}
Don’t forget to call show_cpu_health(&paddle_b, &mut frame); before frame.commit()!
Running the example again you’ll see the health bar for the player and the CPU, and you wouldn’t be able to tell that they are using completely different rendering mechanisms.
What we did
This concludes the pong game tutorial. In this section you’ve learned how to use backgrounds and objects to display dynamic information, and have a feel for how to use both for the task.
In this entire tutorial, you’ve learned:
- How to create and run a brand new game for the Game Boy Advance
- How to load graphics and display them on the screen, with both backgrounds and objects
- How to include sound effects and music in your game
- How to do efficient calculations of non-integer numbers to create more dynamic gameplay
- How to use your knowledge of Game Boy Advance graphics to display information to the player
Next you can take a look at some of the articles to understand some of the more advanced features of the library and hardware in general.
Exercises
- Add an end to the game in whatever way you see would work. Here are some suggestions:
- Replace the backgrounds with a new one displaying a win or lose screen, and allow the player to restart the game
- Add some particle effects by creating lots of sprites and moving them around in the screen
- Add some ‘juice’ to the game. Some suggestions if you’re not sure what to add:
- Use scroll position for screen shake
- Use sprites for particle effects when the ball hits a paddle
- Animate the ball, or add some trail effect with more sprites
- Make the sound effects change pitch randomly
- Slow the game down when you’re about to win / lose
- Take a look at the agb examples and see if you can incorporate some of the more advanced effects into your game like affine sprites / backgrounds or blending
- Share your finished game with us in the show and tell section of our community! We love to see what people have made with
agb.
Learn agb part II: Platformer
In this tutorial, you’ll learn how to make a multi-level platformer using agb and Tiled.
By the end, you’ll have a game where a wizard runs and jumps across tile-based levels, colliding with the terrain, and advancing through multiple stages.
We’ll cover:
- Designing levels in Tiled with custom tile properties.
- Using
build.rsto parse and convert Tiled levels at compile time. - Displaying a scrollable tile-based level on screen.
- Implementing player movement with gravity and friction.
- Tile-based collision detection and response.
- Supporting multiple levels with win detection.
This tutorial assumes you’ve completed the pong tutorial. We’ll build on concepts introduced there — sprites, backgrounds, fixed-point numbers, and input handling — and link back to those chapters when relevant.
Each chapter ends with an optional exercise. Later chapters assume you haven’t done them, so if you do try an exercise, revert those changes before starting the next chapter.
Getting started
In this chapter, we’ll set up a new project for our platformer and download the assets we need.
Creating the project
Start by cloning a fresh copy of the agb template:
git clone https://github.com/agbrs/template.git platform
cd platform
If you haven’t set up your development environment yet, follow the environment setup instructions first.
Setting up Cargo.toml
Our build script will need a few extra dependencies to parse Tiled levels at compile time. Run the following commands to add them:
cargo add --build quote proc-macro2 tiled
Downloading the assets
We need two graphics files for this game: a tileset for the level backgrounds and a sprite sheet for the player character.
Download these files and place them in a gfx/ directory in your project:
- tileset.png — save as
gfx/tileset.png - sprites.aseprite — save as
gfx/sprites.aseprite

Project structure
Once you’ve done the above, your project should look like this:
platform/
├── Cargo.toml
├── gfx/
│   ├── tileset.png
│   └── sprites.aseprite
└── src/
    └── main.rs
Don’t worry about the build.rs or tiled/ directory yet — we’ll create those in the next chapters.
If the template already contains a build.rs, that’s fine — we’ll replace its contents later.
Verify it builds
Before moving on, make sure the template still builds:
cargo build --release
You should see a successful build. The game won’t do anything interesting yet, but this confirms your toolchain is working.
Tiled
Tiled is an open source level editor.
Many agb games have been made using Tiled as their level editors.
For example: The Hat Chooses the Wizard, The Purple Night, The Dungeon Puzzler’s Lament, and Khiera’s Quest all used Tiled.
This will serve as a very quick introduction to using Tiled to make levels. Tiled can do a lot, so I would encourage you to play around with it yourself, but bear in mind we are writing the level loading system. This means that some things that look like features are actually up to us to implement.
You should obtain Tiled using whatever means best supported by your operating system. The documentation for Tiled can be found here.
Getting set up to make a level
Open up Tiled and create a new project, File -> New -> New Project… or using the button that should be on the main page.
Save this project in a tiled/ directory inside your game project (e.g. tiled/platform.tiled-project).
Create a tileset, this can be done through the button that should be on your screen or using File -> New -> New Tileset…. For our game, I have prepared this simple tileset that includes a grassy tile, a wall tile, and a flag that will be for the end of the level.
Give the tileset a relevant name (tileset, for instance) and make sure to set the width and height of the tile to be 8px by 8px.
In the tileset interface, we can attach custom properties to the tiles.
Our game has tiles that are colliding and tiles that if touched cause the level to be beaten.
We can attach these tags to the tileset using Tiled.
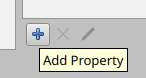
Select all the tiles in the tileset and using the Add property button add WIN and COLLISION boolean properties to every tile.
 Check the collision property on the grass and wall tile, and check the win property on the flag and flagpole.
When we come to writing our level importer, we will need to manually deal with these properties.
Check the collision property on the grass and wall tile, and check the win property on the flag and flagpole.
When we come to writing our level importer, we will need to manually deal with these properties.
Now we want to create a Map, File -> New -> New Map…. Make sure that the tile width and height are both 8px and that the map size is fixed with a width and height of 30x20 tiles.
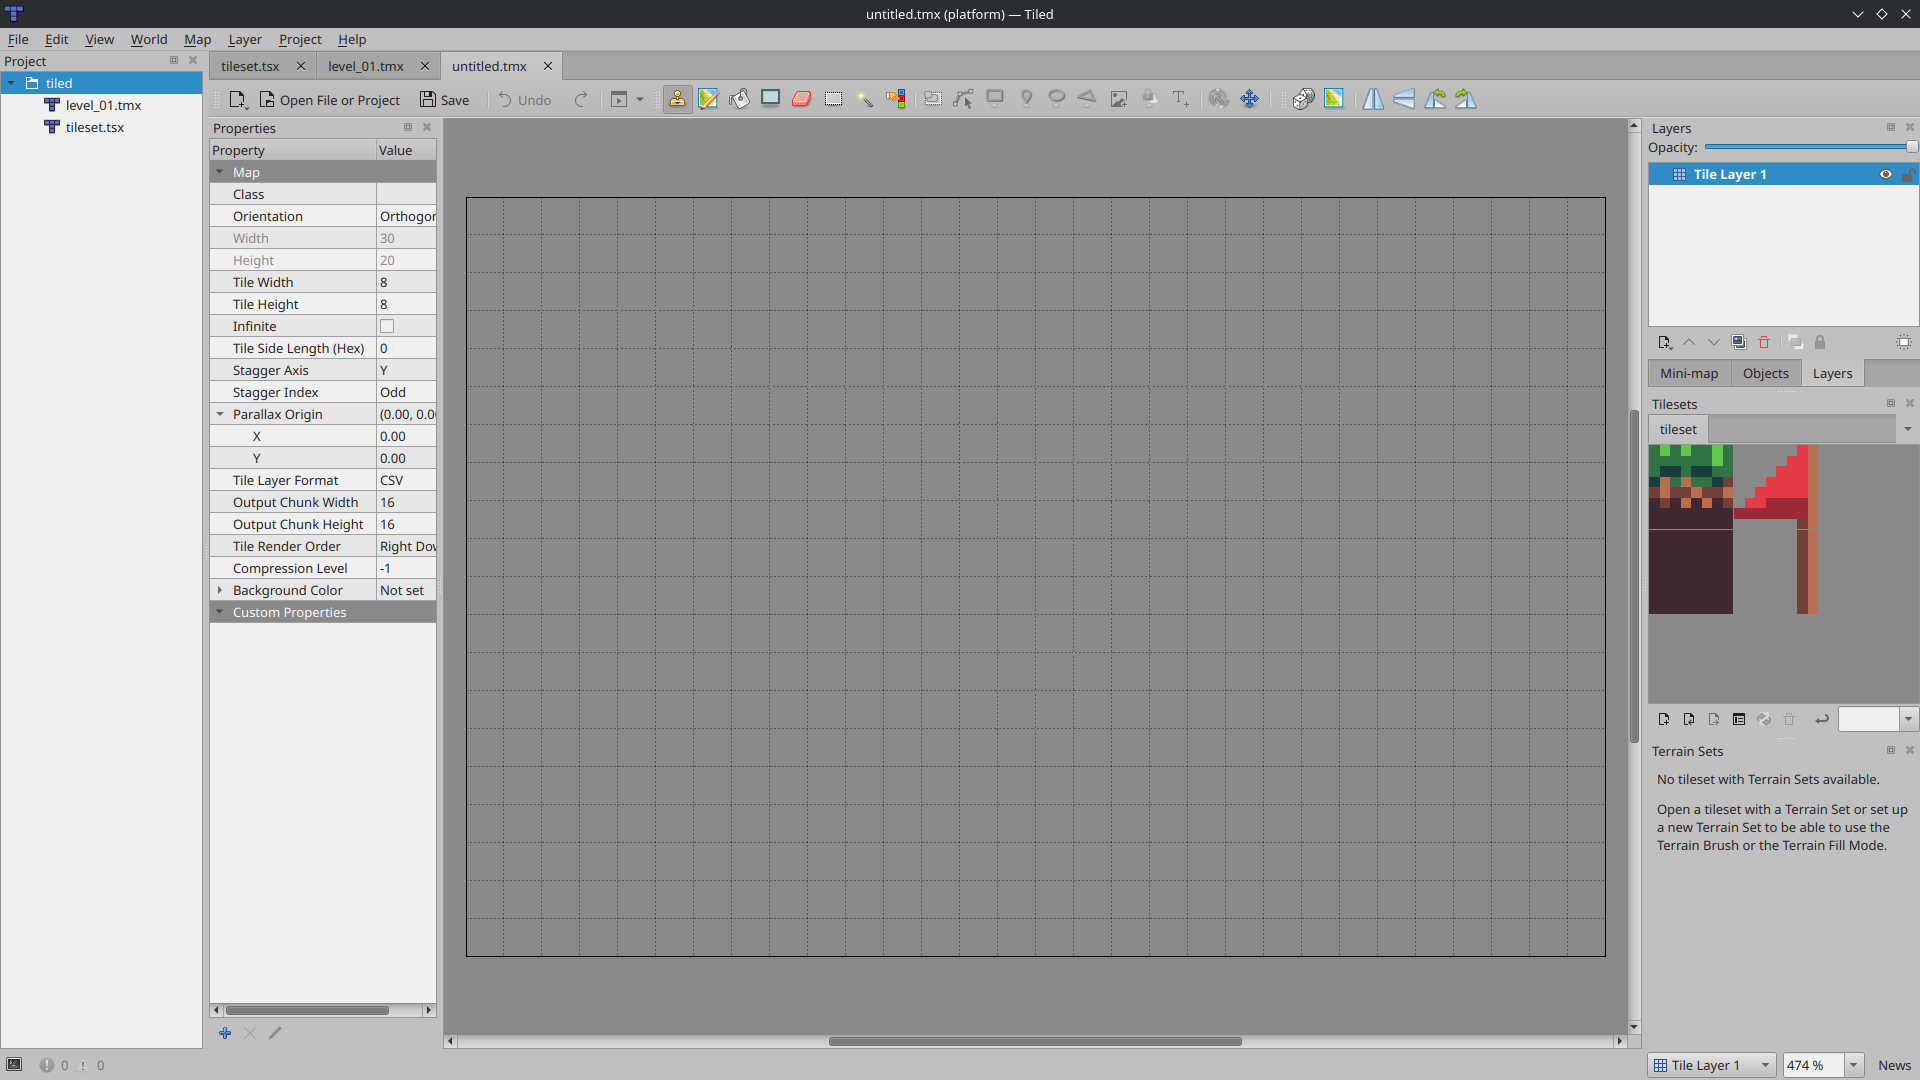
Quickly putting a level together
On the right you see your layers and tilesets.
Rename the layer to be something more useful, for instance Level.
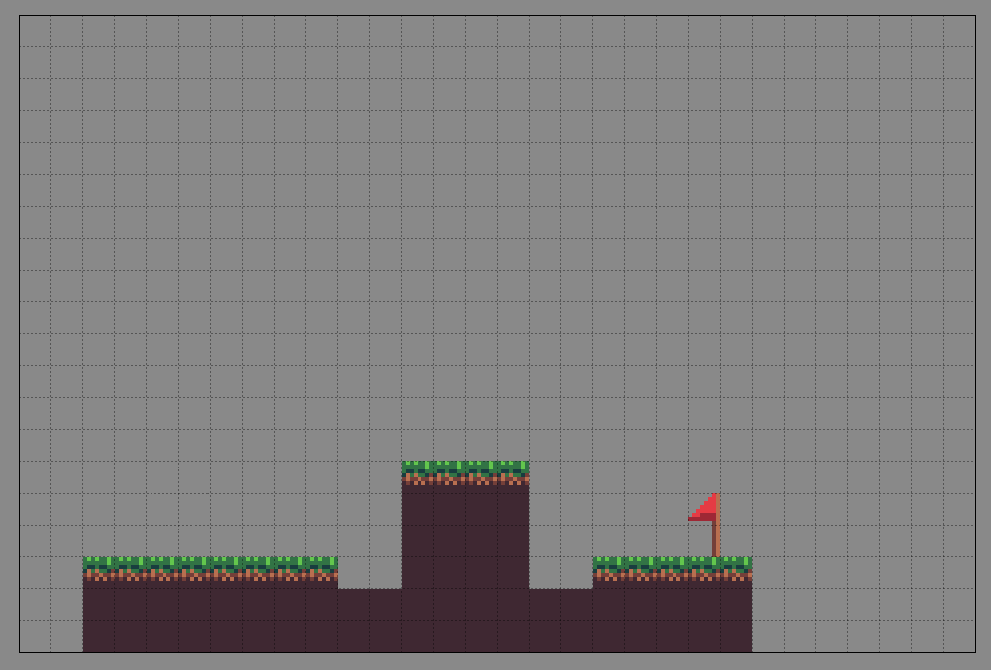
Using your tileset, draw a level out.
Make it very basic because level design is intrinsically linked to the mechanics of your platforming game which we’ve not made yet.
Here’s what I quickly drew.
We want to encode as much about the level as possible in Tiled.
One thing we might think of including is the start position of the player.
We can do this using an object layer.
Layer -> New -> Object Layer and again give it a name like Objects.
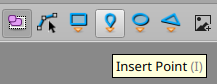
With your object layer selected, in the top bar you should see an Insert Point icon.
Use this to add a point to your level and call the point PLAYER.

Saving
Save the tileset as tiled/tileset.tsx and the map as tiled/level_01.tmx in your project directory.
Your tiled/ directory should now contain:
tiled/
├── platform.tiled-project
├── tileset.tsx
└── level_01.tmx
What we did
We’ve seen how we can use Tiled to put a level together. I would encourage you to take the opportunity to explore around Tiled and get a feel for the tool. In the next chapter we will be writing the importer to make our level accessible to the GBA.
Exercise
Add a spike tile to your tileset and add a SPIKE boolean property to it.
We won’t use it in this tutorial, but it’s good practice for extending your levels with custom tile properties.
Loading levels at build time
We want to parse our Tiled level at build time so the GBA doesn’t have to do any parsing at runtime.
To achieve this, we’ll use a Rust build script (build.rs) that runs on your computer during cargo build, reads the .tmx files, and outputs Rust source code that gets compiled into the game.
What is build.rs?
A build.rs file is a Rust program that Cargo runs before compiling your crate.
It runs on your build machine (not on the GBA), so it has access to the full standard library, file system, and any crates listed under [build-dependencies] in your Cargo.toml.
The build script’s job is to generate code or data that your main crate can then include.
For us, this means reading Tiled .tmx files and outputting efficient Rust data structures.
Create a file called build.rs in the root of your project (next to Cargo.toml).
Some Tiled boilerplate
Working with the tiled library isn’t ideal.
For instance, we’ve given our layers nice names, and it would be convenient to look up a layer by name.
The tiled library doesn’t provide a method for this, so we’ll use the normal trick of making a trait that we implement on the foreign type.
use tiled::{
    FilesystemResourceReader, FiniteTileLayer, Layer, Map, ObjectLayer,
    PropertyValue, ResourceReader, TileLayer,
};

trait GetLayer {
    fn get_layer_by_name(&self, name: &str) -> Layer<'_>;
    fn get_tile_layer(&self, name: &str) -> FiniteTileLayer<'_>;
    fn get_object_layer(&self, name: &str) -> ObjectLayer<'_>;
}

impl GetLayer for Map {
    fn get_layer_by_name(&self, name: &str) -> Layer<'_> {
        self.layers().find(|x| x.name == name).unwrap()
    }
    fn get_tile_layer(&self, name: &str) -> FiniteTileLayer<'_> {
        match self.get_layer_by_name(name).as_tile_layer().unwrap() {
            TileLayer::Finite(finite_tile_layer) => finite_tile_layer,
            TileLayer::Infinite(_) => panic!("Infinite tile layer not supported"),
        }
    }

    fn get_object_layer(&self, name: &str) -> ObjectLayer<'_> {
        self.get_layer_by_name(name).as_object_layer().unwrap()
    }
}
Telling Cargo about our dependencies
A build.rs file only runs when it changes or a dependency changes.
What counts as a dependency?
You have to tell Cargo each file you depend on by using cargo::rerun-if-changed.
We can add this capability in the tiled library by using their ResourceReader trait.
struct BuildResourceReader;

impl ResourceReader for BuildResourceReader {
    type Resource = <FilesystemResourceReader as ResourceReader>::Resource;

    type Error = <FilesystemResourceReader as ResourceReader>::Error;

    fn read_from(
        &mut self,
        path: &std::path::Path,
    ) -> std::result::Result<Self::Resource, Self::Error> {
        println!("cargo::rerun-if-changed={}", path.to_string_lossy());
        FilesystemResourceReader.read_from(path)
    }
}
This adds a reader that passes through to the existing FilesystemResourceReader but intercepts each read to tell Cargo to depend on the file being accessed.
The whole reason for doing this is that loading a Tiled map could mean we also need to load the various files it references, like the tilesets.
If we were to change the tileset, maybe adding tiles or changing the tags, we would like that to be reflected in the next build of our game.
Make sure to properly tell Cargo about your dependencies as it will annoy you otherwise!
An intermediate representation
It is best practice and easier to maintain to import the level into an intermediate representation and then convert that into your game representation. The intermediate representation can be inefficient as it’s going to use your powerful build machine rather than the underpowered GBA.
#[derive(Debug, Clone, Copy)]
struct TileInfo {
    id: Option<u32>,
    colliding: bool,
    win: bool,
}

#[derive(Debug, Clone)]
struct Level {
    size: (u32, u32),
    tiles: Vec<TileInfo>,
    player_start: (i32, i32),
}
TileInfo stores the tile’s ID (or None for empty tiles) and its boolean properties.
Level stores the map dimensions, a flat list of tiles (row by row), and the player’s starting position.
Loading the level
Now we can write the function that reads a .tmx file and returns our intermediate Level.
We’ll need std::error::Error for the return type — add this import to the top of build.rs:
use std::error::Error;fn import_level(level: &str) -> Result<Level, Box<dyn Error>> {
let level = tiled::Loader::with_reader(BuildResourceReader).load_tmx_map(level)?;
let map = level.get_tile_layer("Level");
let objs = level.get_object_layer("Objects");
let width = map.width();
let height = map.height();
let mut tiles = Vec::new();
for y in 0..height {
for x in 0..width {
let tile = match map.get_tile(x as i32, y as i32) {
Some(tile) => {
let properties = &tile.get_tile().unwrap().properties;
let colliding = properties["COLLISION"] == PropertyValue::BoolValue(true);
let win = properties["WIN"] == PropertyValue::BoolValue(true);
TileInfo {
colliding,
win,
id: Some(tile.id()),
}
}
None => TileInfo {
colliding: false,
win: false,
id: None,
},
};
tiles.push(tile);
}
}
let player = objs
.objects()
.find(|x| x.name == "PLAYER")
.expect("Should be able to find the player");
let player_x = player.x as i32;
let player_y = player.y as i32;
Ok(Level {
size: (width, height),
tiles,
player_start: (player_x, player_y),
})
}Let’s break this down:
- We load the map using our
BuildResourceReaderso that Cargo knows about all the files. - We get the tile layer called
"Level"(the one we named in Tiled) and the object layer called"Objects". - We iterate over every tile position, reading its properties. For empty tiles, we use default values.
- We find the
PLAYERpoint object to determine the starting position.
A skeleton main()
To verify everything works, add a temporary main() function:
fn main() -> Result<(), Box<dyn Error>> {
    let level = import_level("tiled/level_01.tmx")?;
    println!("cargo::warning=Loaded level: {}x{}", level.size.0, level.size.1);
    println!("cargo::warning=Player starts at: {:?}", level.player_start);
    Ok(())
}
Run cargo build and you should see these messages as warnings in the build output, confirming the level loads correctly.
What we did
We’ve written the first half of our build script: loading Tiled levels into an intermediate representation. We can now load our level data. In the next chapter, we’ll convert this into a format our game can use.
Exercise
Add a cargo::warning message in your main() to print the total number of colliding tiles.
Run cargo build and check the output.
If you added a SPIKE property to your tileset in the previous chapter’s exercise, extend TileInfo and import_level to pass it through as well.
Converting levels to game data
We now have our level loaded into an intermediate representation. We need to convert this into something efficient for the GBA.
Why two Level structs?
The build-time Level (in build.rs) is convenient to work with but wasteful — it uses Vecs and Options.
We don’t want any of that on the GBA.
The runtime Level (in main.rs) uses flat arrays and bit-packed maps so it takes up as little space as possible.
The runtime Level struct
Open src/main.rs and replace the template code with the following.
First, we need to import our background tiles:
use agb::{
    display::tiled::TileSetting,
    include_background_gfx,
};

extern crate alloc;

include_background_gfx!(mod tiles, "2ce8f4", TILES => "gfx/tileset.png");
The include_background_gfx! macro imports a PNG as a set of background tiles.
The "2ce8f4" is the transparency colour — pixels of this colour become transparent.
This is also used as the background colour where there are no tiles.
TILES is the name we give the resulting tileset.
For more detail, see the Backgrounds chapter of the pong tutorial and the Backgrounds deep dive.
Now define the runtime Level struct:
struct Level {
    width: u32,
    height: u32,
    background: &'static [TileSetting],
    collision_map: &'static [u8],
    winning_map: &'static [u8],
    player_start: (i32, i32),
}
Each field serves a specific purpose:
widthandheight: the level dimensions in tiles.background: a flat array ofTileSettingvalues, one per tile, used to display the level.collision_map: a bit-packed array where each bit represents whether a tile blocks movement.winning_map: a bit-packed array where each bit represents whether a tile triggers a level win.player_start: the pixel coordinates where the player spawns.
Including the generated levels
The build script will output a Rust file into Cargo’s OUT_DIR.
We include it using a levels module:
mod levels {
    use super::Level;
    use agb::display::tiled::TileSetting;
    static TILES: &[TileSetting] = super::tiles::TILES.tile_settings;

    include!(concat!(env!("OUT_DIR"), "/levels.rs"));
}
The critical mapping here: the tile IDs from Tiled correspond to indices into the TILES.tile_settings array.
So TILES[tile_id] gives us the TileSetting for that tile.
We define TILES inside the levels module so the generated code can reference it directly.
Finally, add a placeholder entry point so the game compiles:
#[agb::entry]
fn main(_gba: agb::Gba) -> ! {
    loop {
        agb::halt();
    }
}
Generating the output with quote
Back in build.rs, we need to output Rust source code for our levels.
The quote crate lets us write Rust code that generates Rust code.
It’s widely used in procedural macros, but we can use it in our build script too.
Add these imports to the top of build.rs:
use std::io::Write;

use proc_macro2::TokenStream;
use quote::{ToTokens, quote};
Implementing ToTokens for Level
We implement the ToTokens trait on our build-time Level to define how it converts to Rust source code:
impl ToTokens for Level {
    fn to_tokens(&self, tokens: &mut TokenStream) {
        let background_tiles = self.tiles.iter().map(|x| match x.id {
            // if the tile is defined, look up the TileSetting in the background tiles
            Some(x) => quote! { TILES[#x as usize] },
            // otherwise, use the blank tile
            None => quote! { TileSetting::BLANK },
        });

        // this creates the bit-array from the booleans on the tiles.
        let collision_map = self.tiles.chunks(8).map(|x| {
            x.iter()
                .map(|x| x.colliding as u8)
                .fold(0u8, |a, b| (a >> 1) | (b << 7))
        });

        let winning_map = self.tiles.chunks(8).map(|x| {
            x.iter()
                .map(|x| x.win as u8)
                .fold(0u8, |a, b| (a >> 1) | (b << 7))
        });

        let (player_x, player_y) = self.player_start;
        let (width, height) = self.size;

        quote! {
            Level {
                width: #width,
                height: #height,
                background: &[#(#background_tiles),*],
                collision_map: &[#(#collision_map),*],
                winning_map: &[#(#winning_map),*],
                player_start: (#player_x, #player_y),
            }
        }
        .to_tokens(tokens)
    }
}
The quote! macro uses #variable to splice in values and #(#iter),* to expand iterators with commas between elements.
The bit-packing deserves some explanation. We pack 8 booleans into each byte. For each chunk of 8 tiles, we fold them together: shift the existing bits right by one position and place the new bit in the top position (bit 7). After processing all 8 tiles in a chunk, bit 0 of the byte corresponds to the first tile in the chunk, bit 1 to the second, and so on.
The complete main() for build.rs
Replace the skeleton main() we wrote in the previous chapter with the real one:
static LEVELS: &[&str] = &["level_01.tmx"];

fn main() -> Result<(), Box<dyn Error>> {
    let out_dir = std::env::var("OUT_DIR").unwrap();
    let out_file_name = format!("{out_dir}/levels.rs");
    let mut file = std::fs::File::create(out_file_name)?;

    for (number, level) in LEVELS.iter().enumerate() {
        let ident = quote::format_ident!("LEVEL_{}", number);
        let level = import_level(&format!("tiled/{level}"))?;
        let content = quote! {
            static #ident: Level = #level;
        };
        writeln!(file, "{content}")?;
    }

    let levels = (0..LEVELS.len()).map(|x| quote::format_ident!("LEVEL_{}", x));
    writeln!(
        file,
        "{}",
        quote! {
            pub static LEVELS: &[&Level] = &[#(&#levels),*];
        }
    )?;

    Ok(())
}
This iterates over each level file, loads it, converts it to tokens, and writes it to levels.rs in the output directory.
It also creates a LEVELS array that holds references to all levels, which we’ll use later to iterate through them.
What we did
We’ve completed the build script.
It loads Tiled levels, converts them into efficient bit-packed data, and outputs Rust code that gets compiled directly into the ROM.
Run cargo build and take a look at the generated levels.rs file in your target’s output directory (check the OUT_DIR path in your build output) to see what the build script produces.
In the next chapter, we’ll display this level on screen.
Exercise
If you completed the previous exercises and added a spike field to TileInfo, add a spike_map to the runtime Level struct and output it from the build script, using the same bit-packing approach as collision_map.
Displaying the level
To display the level we have made, we will make use of agb’s InfiniteScrolledMap.
The InfiniteScrolledMap wraps a regular background and handles scrolling for you.
It calls a callback for each tile position that becomes visible on screen, asking “what tile should I display here?”
This means it only updates tiles that have actually changed, which is very efficient.
For the task of displaying a level or a world, the InfiniteScrolledMap is the best choice.
Updating our imports
Update the imports in src/main.rs to include everything we need for this chapter:
use agb::{
    display::{
        GraphicsFrame, Priority,
        tiled::{
            InfiniteScrolledMap, RegularBackground, RegularBackgroundSize,
            TileFormat, TileSetting,
        },
    },
    fixnum::{Rect, Vector2D, rect, vec2},
    include_background_gfx,
};

extern crate alloc;
Adding bounds() to Level
Let’s add a convenience method to the Level struct to get its bounds as a Rect.
Add this after the Level struct definition:
impl Level {
    fn bounds(&self) -> Rect<i32> {
        rect(
            vec2(0, 0),
            // Rect's size is inclusive of the edge, so a size of (width - 1)
            // covers tile coordinates 0 through width - 1.
            vec2(self.width as i32 - 1, self.height as i32 - 1),
        )
    }
}
The World struct
We’ll encapsulate the background and the level into a World struct:
struct World {
    level: &'static Level,
    bg: InfiniteScrolledMap,
}

impl World {
    fn new(level: &'static Level) -> Self {
        let bg = RegularBackground::new(
            Priority::P0,
            RegularBackgroundSize::Background32x32,
            TileFormat::FourBpp,
        );
        let bg = InfiniteScrolledMap::new(bg);

        World { level, bg }
    }

    fn set_pos(&mut self, pos: Vector2D<i32>) {
        self.bg.set_scroll_pos(pos, |pos| {
            let tile = if self.level.bounds().contains_point(pos) {
                // Convert 2D coordinates to a 1D index into our flat tile array.
                // This is called row-major indexing.
                let idx = pos.x + pos.y * self.level.width as i32;
                self.level.background[idx as usize]
            } else {
                // Use the transparent tile outside the level bounds.
                // agb may contain specific optimizations around the blank tile.
                TileSetting::BLANK
            };

            (&tiles::TILES.tiles, tile)
        });
    }

    fn show(&self, frame: &mut GraphicsFrame) {
        self.bg.show(frame);
    }
}
It’s always a good idea to wrap the set_scroll_pos call in a method like this.
By providing the callback every time, it makes lifetimes easier to manage.
The callback receives a Vector2D<i32> representing a tile coordinate (not a pixel coordinate).
We return a tuple of the tileset and the TileSetting for that position.
The main function
Now we can write the main function to use our World:
#[agb::entry]
fn main(mut gba: agb::Gba) -> ! {
    let mut gfx = gba.graphics.get();

    gfx.set_background_palettes(tiles::PALETTES);
    let mut bg = World::new(levels::LEVELS[0]);

    loop {
        // We pass (0, 0) for now since the camera doesn't move yet.
        // We'll revisit this when we add a player.
        bg.set_pos(vec2(0, 0));

        let mut frame = gfx.frame();

        bg.show(&mut frame);

        frame.commit();
    }
}
Running this should display your level on the screen!
What we did
We’ve seen how to use the InfiniteScrolledMap to display a Tiled level on the screen.
Exercise
Make a level wider than the screen (e.g. 60x20 tiles) and use the D-Pad to scroll around.
You’ll need a ButtonController — see the Paddle movement chapter for a refresher on handling input.
The player
In this chapter, we’ll get our player character on screen with movement, gravity, and jumping. We’ll use a temporary floor to keep the player from falling off the screen, and replace it with proper collision detection in the next chapter.
The wizard sprite
This will be the character we use, the wizard from The Hat Chooses the Wizard.
The file contains a few tags that define various animations that we will be using.
We already placed this file at gfx/sprites.aseprite during setup.

Add the sprite import to your main.rs, alongside the existing include_background_gfx!:
use agb::include_aseprite;

include_aseprite!(mod sprites, "gfx/sprites.aseprite");
The include_aseprite! macro works similarly to include_background_gfx! — it reads the aseprite file at compile time and creates a module with an entry for each tag.
For more detail, see the Sprites chapter of the pong tutorial and the Objects deep dive.
Fixed-point numbers
We need sub-pixel precision for smooth movement.
We’ll use agb’s fixed-point numbers for this — if you need a refresher, see the Fixnums chapter of the pong tutorial or the Fixnums article.
Define these type aliases near the top of main.rs:
use agb::fixnum::{Num, num};

type Number = Num<i32, 8>;
type Vector = Vector2D<Number>;
Num<i32, 8> gives us a fixed-point number with 8 fractional bits — enough precision for smooth sub-pixel movement.
Step 1: Define the Player struct
use agb::display::object::{Object, SpriteVram};

struct Player {
    position: Vector,
    velocity: Vector,
    frame: usize,
    sprite: SpriteVram,
    flipped: bool,
    start_y: Number,
}

impl Player {
    fn new(start: Vector2D<i32>) -> Self {
        Player {
            position: start.change_base(),
            velocity: vec2(num!(0), num!(0)),
            frame: 0,
            sprite: sprites::STANDING.sprite(0).into(),
            flipped: false,
            start_y: Number::new(start.y),
        }
    }

    fn show(&self, frame: &mut GraphicsFrame) {
        Object::new(self.sprite.clone())
            .set_hflip(self.flipped)
            .set_pos(self.position.round() - vec2(8, 8))
            .show(frame);
    }
}
The sprite field holds a SpriteVram — a reference to sprite data that has been loaded into video RAM.
We initialize it with the first frame of the STANDING animation.
The show method creates an Object, flips it horizontally if needed, and positions it.
We subtract (8, 8) because the sprite’s origin is at its top-left corner, but we want position to represent the center of the sprite.
Update the main function to create and show the player:
#[agb::entry]
fn main(mut gba: agb::Gba) -> ! {
    let mut gfx = gba.graphics.get();
    gfx.set_background_palettes(tiles::PALETTES);

    let level = levels::LEVELS[0];
    let mut bg = World::new(level);
    let mut player = Player::new(level.player_start.into());

    loop {
        bg.set_pos(vec2(0, 0));

        let mut frame = gfx.frame();

        bg.show(&mut frame);
        player.show(&mut frame);

        frame.commit();
    }
}
Run this now — you should see the wizard at the start position on your level.
Step 2: Horizontal movement
Add input handling to the player.
First, add the ButtonController import:
use agb::input::{Button, ButtonController};Now add the horizontal input handler:
impl Player {
    fn handle_horizontal_input(&mut self, x_tri: i32, on_ground: bool) {
        let mut x = x_tri;

        // If we're trying to move in a direction opposite to what
        // we're currently moving, we should decelerate faster.
        // This is a classic trick that makes direction changes feel
        // snappy — the original Super Mario Bros uses the same trick!
        if x_tri.signum() != self.velocity.x.to_raw().signum() {
            x *= 2;
        }

        if on_ground {
            x *= 2;
        }

        self.velocity.x += Number::new(x) / 16;
    }
}
When on the ground, we double the acceleration for snappier movement.
Step 3: Jumping and gravity
impl Player {
    fn handle_jump(&mut self) {
        self.velocity.y = Number::new(-2);
    }
}
A simple negative Y velocity sends the player upward.
Step 4: Animation
We need to update the sprite based on the player’s state:
impl Player {
    fn update_sprite(&mut self) {
        self.frame += 1;

        // We need to keep track of the facing direction rather than
        // deriving it because the zero velocity case needs to keep
        // facing the same direction.
        if self.velocity.x > num!(0.1) {
            self.flipped = false;
        }
        if self.velocity.x < num!(-0.1) {
            self.flipped = true;
        }

        self.sprite = if self.velocity.y < num!(-0.1) {
            sprites::JUMPING.animation_frame(&mut self.frame, 2)
        } else if self.velocity.y > num!(0.1) {
            sprites::FALLING.animation_frame(&mut self.frame, 2)
        } else if self.velocity.x.abs() > num!(0.05) {
            sprites::WALKING.animation_frame(&mut self.frame, 2)
        } else {
            sprites::STANDING.animation_frame(&mut self.frame, 2)
        }
        .into()
    }
}
The animation_frame method cycles through the frames of a tag at the given speed.
The 2 parameter is a shift, so each animation frame is displayed for 4 game frames.
Step 5: The update function
Now tie it all together:
impl Player {
    fn update(&mut self, input: &ButtonController) {
        // We don't have collision yet, so use the starting y position
        // as a temporary floor to prevent the player from falling off
        // the screen.
        let on_ground = self.position.y >= self.start_y;

        self.handle_horizontal_input(input.x_tri() as i32, on_ground);

        if input.is_just_pressed(Button::A) && on_ground {
            self.handle_jump();
        }

        // gravity
        self.velocity.y += num!(0.05);

        // friction: multiply by 15/16 each frame
        self.velocity.x *= 15;
        self.velocity.x /= 16;

        // apply velocity to position (no collision yet!)
        self.position += self.velocity;

        // clamp to the temporary floor
        if self.position.y > self.start_y {
            self.position.y = self.start_y;
            self.velocity.y = num!(0);
        }

        self.update_sprite();
    }
}
Friction is applied as a simple ratio: each frame, horizontal velocity is multiplied by 15/16 (93.75%). This causes the player to gradually slow down when not pressing any buttons.
We use the player’s starting Y position as a temporary floor so we can test movement and jumping before we have real collision detection. We’ll replace this with proper collision in the next chapter.
Update the main loop to call update:
#[agb::entry]
fn main(mut gba: agb::Gba) -> ! {
    let mut gfx = gba.graphics.get();
    gfx.set_background_palettes(tiles::PALETTES);

    let level = levels::LEVELS[0];
    let mut bg = World::new(level);
    let mut input = ButtonController::new();

    let mut player = Player::new(level.player_start.into());

    loop {
        input.update();
        bg.set_pos(vec2(0, 0));
        player.update(&input);

        let mut frame = gfx.frame();

        bg.show(&mut frame);
        player.show(&mut frame);

        frame.commit();
    }
}
Run the game now. You should see the wizard standing at the start position. You can move left and right with the D-Pad and jump with A. The player won’t fall through the floor thanks to our temporary clamp, but they will walk through walls — we’ll add proper collision in the next chapter.
What we did
We’ve got the player on screen with movement, gravity, and jumping. The character can move left and right, jump, and is affected by gravity. The temporary floor keeps the player from falling off the screen, but they pass through walls and platforms. In the next chapter, we’ll add proper collision detection.
Exercise
Experiment with the gravity and jump velocity values.
What happens if you set gravity to num!(0.1)?
What about jump velocity of num!(-3)?
Many platformers spend a lot of time tuning these values to get the movement feeling right.
Try implementing variable jump height: reduce gravity while the A button is held so that tapping A gives a short hop and holding it gives a full jump.
Collision
In the previous chapter we added a temporary floor clamp to stop the player falling off the screen. Now let’s replace that with real collision detection.
First, remove the start_y field from Player and the floor clamping logic in update — we won’t need them any more.
Collision detection
First, we need a way to check whether a given tile position is solid.
Add this method to the Level struct:
impl Level {
    fn collides(&self, tile: Vector2D<i32>) -> bool {
        if !self.bounds().contains_point(tile) {
            return false;
        }

        let idx = (tile.x + tile.y * self.width as i32) as usize;

        self.collision_map[idx / 8] & (1 << (idx % 8)) != 0
    }
}
This is the reverse of what we did in the build script.
We find which byte the tile is in (idx / 8) and which bit within that byte (idx % 8).
If that bit is set, the tile is solid.
Ground detection
We need to know when the player is standing on something so they can jump.
Add is_on_ground to the Player:
impl Player {
    fn is_on_ground(&self, level: &Level) -> bool {
        let position_to_check = vec2(
            self.position.x,
            self.position.y + 8 + Number::from_raw(1),
        );
        level.collides(position_to_check.floor() / 8)
    }
}
We check one sub-pixel below the bottom of the sprite.
If there’s a collision there, we’re standing on something.
The + 8 accounts for the half-height of the sprite (since position is the center), and Number::from_raw(1) adds the smallest possible sub-pixel offset.
How collision response works
Collision detection (asking “is there a solid tile here?”) is straightforward. Collision response (deciding what to do about it) is the hard part, and contributes significantly to how your game feels.
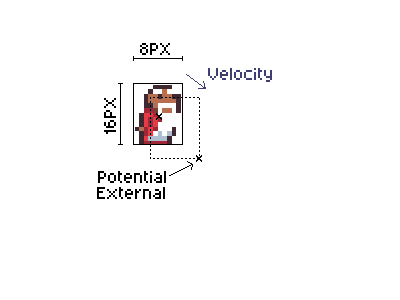
Our approach handles each axis (X and Y) independently. For each axis, we:
- Calculate where the player would be after applying velocity (
potential). - Find the leading edge of the sprite in the direction of movement (
potential_external). For horizontal movement, this is 4 pixels from center (the sprite’s half-width). For vertical movement, this is 8 pixels from center (the sprite’s half-height). - Convert that edge position to tile coordinates.
- If the tile is not solid: move to the potential position.
- If the tile is solid: snap the player so their edge is flush with the tile boundary, and zero the velocity.
By handling each axis independently, we avoid corner cases where diagonal movement could clip through walls.
The collision handler
impl Player {
    fn handle_collision_component(
        velocity: &mut Number,
        position: &mut Number,
        half_width: i32,
        colliding: &dyn Fn(i32) -> bool,
    ) {
        let potential = *position + *velocity;
        let potential_external = potential + velocity.to_raw().signum() * half_width;

        let target_tile = potential_external.floor() / 8;

        if !colliding(target_tile) {
            *position = potential;
        } else {
            let center_of_target_tile = target_tile * 8 + 4;
            let player_position =
                center_of_target_tile - velocity.to_raw().signum() * (4 + half_width);
            *position = player_position.into();
            *velocity = 0.into();
        }
    }

    fn handle_collision(&mut self, level: &Level) {
        Self::handle_collision_component(&mut self.velocity.x, &mut self.position.x, 4, &|x| {
            level.collides(vec2(x, self.position.y.floor() / 8))
        });
        Self::handle_collision_component(&mut self.velocity.y, &mut self.position.y, 8, &|y| {
            level.collides(vec2(self.position.x.floor() / 8, y))
        });
    }
}
Let’s walk through handle_collision_component step by step:
potential: where the player’s center would be after applying velocity.potential_external: the leading edge of the sprite in the direction of movement. We usevelocity.to_raw().signum()to get the direction (+1 or -1) and multiply by the half-width to find the edge.target_tile: the tile coordinate that the leading edge would enter.- If no collision: we simply move to the potential position.
- If collision: we find the center of the colliding tile, then position the player so their edge is just outside it. The
4 + half_widthaccounts for half of the tile (4 pixels) plus half of the sprite, ensuring the edges are flush. We also zero the velocity to stop movement in that direction.
The handle_collision method calls the component handler twice: once for X (using a half-width of 4 pixels) and once for Y (using a half-height of 8 pixels).
Each closure checks for collisions using the current position on the other axis.
The order matters: handling X first means horizontal movement is resolved before vertical. This gives the player priority for barely making it onto a ledge, if you’re jumping diagonally toward a platform edge, the X position is corrected first, which can make the difference between landing on top and crashing into the side.
Updating the update function
Now replace the update method on Player with the full version that includes gravity and collision:
impl Player {
    fn update(&mut self, input: &ButtonController, level: &Level) {
        let on_ground = self.is_on_ground(level);

        self.handle_horizontal_input(input.x_tri() as i32, on_ground);

        if input.is_just_pressed(Button::A) && on_ground {
            self.handle_jump();
        }

        self.velocity.y += num!(0.05);
        self.velocity.x *= 15;
        self.velocity.x /= 16;
        self.handle_collision(level);

        self.update_sprite();
    }
}
The key changes from the previous chapter:
on_groundnow uses the realis_on_groundcheck instead of the temporary floor clamp.- Instead of
self.position += self.velocity, we callself.handle_collision(level)which applies velocity while checking for collisions. - The
start_yfield and floor clamping are gone — collision handles everything now.
Update the main function to pass the level to update:
#[agb::entry]
fn main(mut gba: agb::Gba) -> ! {
    let mut gfx = gba.graphics.get();
    gfx.set_background_palettes(tiles::PALETTES);

    let level = levels::LEVELS[0];
    let mut bg = World::new(level);
    let mut input = ButtonController::new();

    let mut player = Player::new(level.player_start.into());

    loop {
        input.update();
        bg.set_pos(vec2(0, 0));
        player.update(&input, level);

        let mut frame = gfx.frame();

        bg.show(&mut frame);
        player.show(&mut frame);

        frame.commit();
    }
}
Run the game now — the wizard should stand on platforms, run left and right, and jump with the A button!
What we did
We’ve added tile-based collision detection and response. The player can now stand on platforms, walk along them, and jump. Not many games come with a single level though — in the next chapter we’ll add win detection and multiple levels.
Multiple levels
Our game currently has a single level. In this chapter, we’ll add win detection, refactor the code to support multiple levels, and wire it all together.
Refactoring: moving the player into World
First, let’s move the Player into the World struct.
This makes it easier to reset everything when changing levels.
struct World {
    level: &'static Level,
    player: Player,
    bg: InfiniteScrolledMap,
}

impl World {
    fn new(level: &'static Level) -> Self {
        let bg = RegularBackground::new(
            Priority::P0,
            RegularBackgroundSize::Background32x32,
            TileFormat::FourBpp,
        );
        let bg = InfiniteScrolledMap::new(bg);

        World {
            level,
            bg,
            player: Player::new(level.player_start.into()),
        }
    }

    fn update(&mut self, input: &ButtonController) {
        self.set_pos(vec2(0, 0));

        self.player.update(input, self.level);
    }

    fn show(&self, frame: &mut GraphicsFrame) {
        self.bg.show(frame);
        self.player.show(frame);
    }
}
Detecting level end
To advance to the next level, we need to check if the player has reached the win tile.
This is very similar to the collides method:
impl Level {
    fn wins(&self, tile: Vector2D<i32>) -> bool {
        if !self.bounds().contains_point(tile) {
            return false;
        }

        let idx = (tile.x + tile.y * self.width as i32) as usize;

        self.winning_map[idx / 8] & (1 << (idx % 8)) != 0
    }
}
Then add a has_won method to both Player and World:
impl Player {
    fn has_won(&self, level: &Level) -> bool {
        level.wins(self.position.floor() / 8)
    }
}

impl World {
    fn has_won(&self) -> bool {
        self.player.has_won(self.level)
    }
}
Updating the main function
With these changes, the main function becomes:
#[agb::entry]
fn main(mut gba: agb::Gba) -> ! {
    let mut gfx = gba.graphics.get();
    gfx.set_background_palettes(tiles::PALETTES);

    let mut level = 0;
    let mut world = World::new(levels::LEVELS[level]);
    let mut input = ButtonController::new();

    loop {
        input.update();
        world.update(&input);

        let mut frame = gfx.frame();

        world.show(&mut frame);

        frame.commit();

        if world.has_won() {
            level += 1;
            level %= levels::LEVELS.len();
            world = World::new(levels::LEVELS[level]);
        }
    }
}
When the player reaches a win tile, we advance to the next level (wrapping back to the first level after the last one).
Adding more levels
To add more levels, create them in Tiled, save them in the tiled/ directory, and add them to the level array in build.rs:
static LEVELS: &[&str] = &["level_01.tmx", "level_02.tmx"];And the rest will be done for you!
What we did
We’ve made a game that has multiple levels and can transition between them. There are many things you could do from here to make the game your own. Here are some ideas:
- Fall detection. If the player falls below the bottom of the level, restart the current level. You’ll need to check
player.position.yagainst the level height (in pixels:level.height * 8). - Spike detection. If you completed the spike exercises from earlier chapters, touching a spike tile should also restart the level.
- Loading transitions. Loading happens over multiple frames and should be hidden from view.
- Camera scrolling. Make the camera follow the player for levels larger than the screen.
- Sound effects. Add a jump sound or landing sound using
agb’s audio support.
Frame lifecycle
Games written using agb typically follow the ‘update-render loop’.
The way your components update will vary depending on the game you are writing, but each frame you would normally do the following:
let mut gfx = gba.graphics.get();

loop {
    my_game.update();

    let mut frame = gfx.frame();
    my_game.show(&mut frame);
    frame.commit();
}
Here we will discuss the idiomatic way of using the GraphicsFrame during the lifecycle of a frame.
.show(frame: &mut GraphicsFrame)
The most common pattern involving GraphicsFrame you’ll see in the agb library is a .show() method which typically accepts a mutable reference to a GraphicsFrame.
Due to this naming convention, it is also conventional in games written using agb to name the render method show() and have the same method signature.
You should not be doing any mutation of state during the show() method, and as much loading and other CPU intensive work as possible should be done prior to the call to show().
See the frame lifecycle example for a simple walkthrough for how to manage a frame with a single player character.
.commit()
Once everything you want to be visible on the frame is ready, you should follow this up with a call to .commit() on the frame.
This will wait for the current frame to finish rendering before quickly setting everything up for the next frame.
This method takes ownership of the current frame instance, so you won’t be able to use it for any further calls once this is done.
You will need to create a new frame object from the gfx instance.
See also
These are the various aspects of agb that interact with the GraphicsFrame system.
Input handling
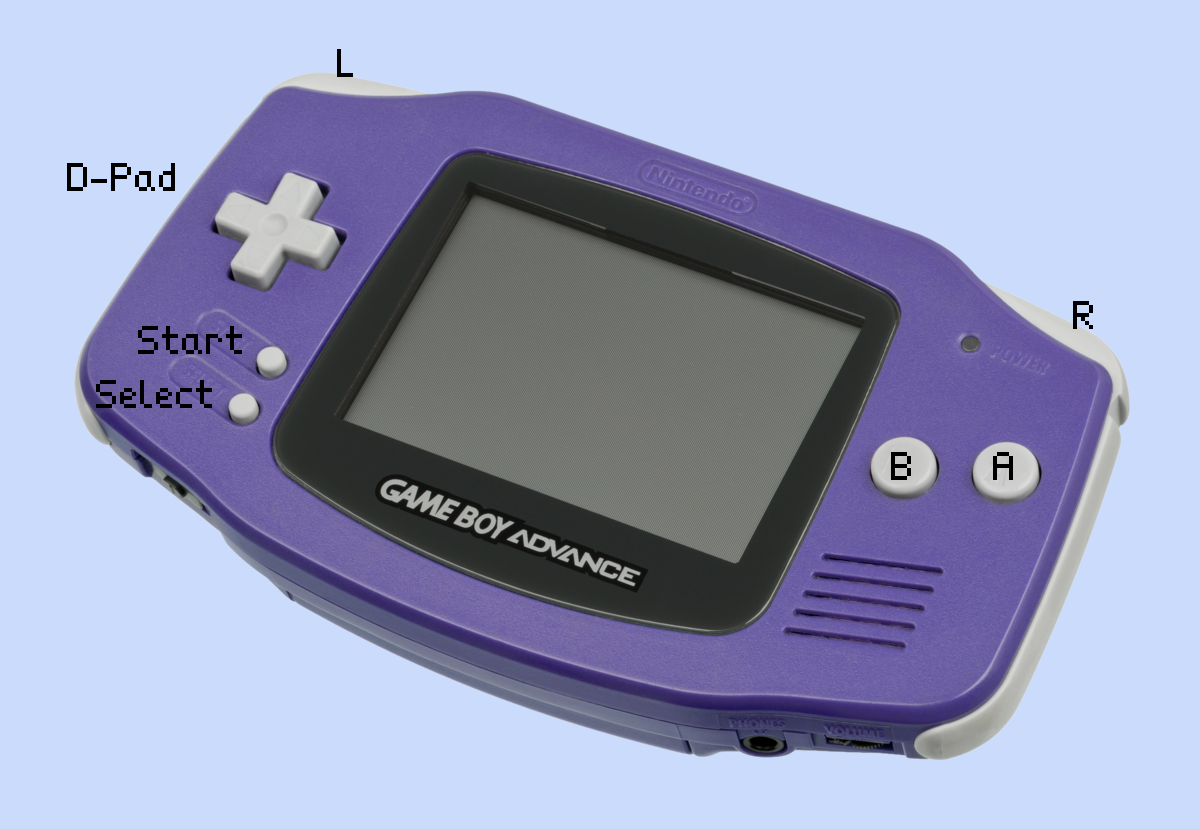
The Game Boy Advance provides a total of 10 buttons.
- The 4 directional pad (D-Pad)
- The A and B buttons
- The L and R triggers
- Start and select buttons
These are represented in agb with the Button struct.
When running the game under an emulator, the default key-mapping on a QWERTY keyboard is as follows:
| GBA button | Emulator |
|---|---|
| D-pad | Arrow keys |
| A | X |
| B | Z |
| Start | Enter |
| Select | Backspace |
| L trigger | A |
| R trigger | S |
Reading the current state
To track the currently pressed buttons, you need a ButtonController.
Create one with the ButtonController::new() method, and then each frame use the update() method to update its current state.
use agb::input::ButtonController;

let mut button_controller = ButtonController::new();

loop {
    button_controller.update();
    // Do your game logic using the button_controller

    let mut frame = gfx.frame();
    // ...
    frame.commit();
}
In theory you could have multiple ButtonController instances across your game, but most will create one and pass it through as needed.
Useful ButtonController methods
There are a few methods provided on the ButtonController which allow you to easily handle user input.
.is_pressed() and .is_released()
The simplest methods are the is_pressed() and is_released() methods.
These takes a Button and returns a boolean indicated whether or not the given button is pressed or released.
if button_controller.is_pressed(Button::B) {
    // do something while the `B` button is pressed
}
You can use this method for changing some state while a button is pressed.
For example, increasing the player’s speed while they are pressing the B button to implement running.
.is_just_pressed() and .is_just_released()
These will return true for 1 frame when the provided button transitions from not pressed to pressed. You can use these as interaction with a menu, or a jump.
You could use .is_just_released() to act on a menu action to do the action on release of the button.
if button_controller.is_just_released(Button::A) {
    // do the action of the currently selected menu item
}x_tri(), y_tri() and lr_tri()
The Tri enum represents a negative, zero or positive value.
Its main use is to represent whether the D-Pad could be considered to be going in some direction or not at all, gracefully handling the case where the player has both buttons pressed at once.
Tri can be converted to a signed integer to use it to easily move something player controlled.
For example, we use it in the ‘pong’ tutorial to move the paddle based on the y direction being pressed.
paddle.move_by(button_controller.y_tri() as i32);These methods also have just_pressed() variants which can be used in the same way as the is_just_pressed() methods to be able to have a direction which is affected for a single frame.
vector()
The vector() method is a combination of the x_tri() and y_tri() methods.
It returns a vector with an x and y component of -1, 0 or 1 depending on whether that direction is pressed.
This can be used to move a player around in a 2d-plane, or you can use the just_pressed_vector() to allow navigation of a 2d menu.
Checking for any button presses
Methods which accept Button as an argument can check if any of the specified buttons are currently pressed.
You can combine buttons using |:
if button_controller.is_pressed(Button::A | Button::B) {
    // This will happen if `A` or `B` (or both) are pressed
}
Checking for simultaneous presses
If you need to check if multiple buttons are pressed simultaneously (for example, holding A and B together), you must check the states individually.
if button_controller.is_pressed(Button::A) && button_controller.is_pressed(Button::B) {
    // This will happen if both `A` and `B` are pressed
}
Using this with is_just_pressed isn’t recommended because it can be quite hard to press button simultaneously within the 1/60th of a frame time you’d have.
It is usually better to use is_pressed for simultaneous combinations.
The panic screen
If a game written using agb panics, you’ll be greeted with a crash screen.
This screen provides both the panic message along with a special code which you can use to produce a stack trace for the error.
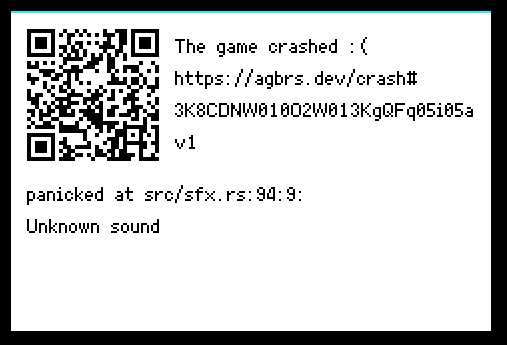
The QR code shown will also link you to the agb website where you can view more details about the crash (in the case for the example above, here).
If using the mGBA emulator, the link will also be printed to the console.
All the information is calculated from the code (3K8CDNW010O2W013KgQFq05i05av1 in the above case), and no information about your game is transmitted to the crash page.
It mainly exists to provide you with an easy way to transfer the code to your computer so you can examine the crash more easily.
Decoding the results
The crash screen will include the file and line number where the panic occurred. This is often enough to work out where the issue may lie. However, sometimes it is useful to get the full stack trace.
The agb-debug cli
You can install the agb-debug tool with the following command:
cargo install --git=https://github.com/agbrs/agb.git agb-debug
Then with agb-debug, you can give it a link to the elf file for your ROM and the code and it’ll give the full stack trace.
For example:
$ agb-debug target/thumbv4t-none-eabi/release/the_hat_chooses_the_wizard 3K8CDNW010O2W013KgQFq05i05av1
0:	__rustc::rust_begin_unwind <agb>/lib.rs:407
		let frames = backtrace::unwind_exception();
		             ^
1:	core::panicking::panic_fmt <core>/panicking.rs:75
2:	the_hat_chooses_the_wizard::sfx::SfxPlayer::snail_death <the-hat-chooses-the-wizard>/sfx.rs:94
		panic!("Unknown sound");
		^
3:	the_hat_chooses_the_wizard::enemies::Snail::update <the-hat-chooses-the-wizard>/enemies.rs:350
		sfx_player.snail_death();
		^
	(inlined into) the_hat_chooses_the_wizard::enemies::Enemy::update <the-hat-chooses-the-wizard>/enemies.rs:51
		Enemy::Snail(snail) => snail.update(level, player_pos, hat_state, timer, sfx_player),
		                       ^
4:	the_hat_chooses_the_wizard::PlayingLevel::update_frame <the-hat-chooses-the-wizard>/lib.rs:681
		match enemy.update(
		      ^
	(inlined into) the_hat_chooses_the_wizard::main <the-hat-chooses-the-wizard>/lib.rs:813
		match level.update_frame(&mut sfx) {
		      ^
5:	the_hat_chooses_the_wizard::_agb_main_func_2381583852303396514::inner <the-hat-chooses-the-wizard>/main.rs:9
		the_hat_chooses_the_wizard::main(gba);
		^
6:	main <the-hat-chooses-the-wizard>/main.rs:7
		#[agb::entry]
		^
The agb-debug cli will include the actual code snippets from your filesystem if it can find it.
agbrs.dev/crash
You can also use the crash page itself, giving it your elf file.
All this is done within your browser, and nothing gets passed to the agb servers.
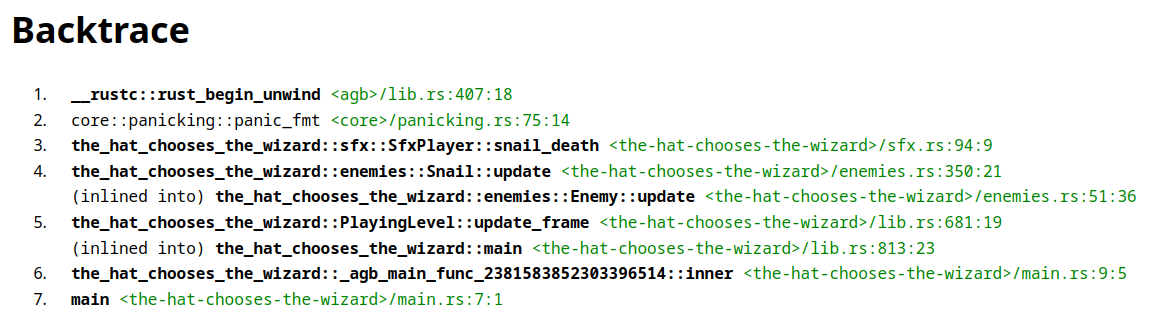
Debugging .gba files
When creating a .gba file using agb-gbafix, it will, by default, strip out the debug information which is required to provide the backtrace information as shown.
You are able to run the .gba file and pass agb-gbafix the elf file which was converted into the gba file if needed.
However, you can also include all the debug information in the gba file itself by passing the -g argument to agb-gbafix.
$ agb-gbafix -g target/thumbv4t-none-eabi/release/my_game target/my_game.gba
Both the backtrace viewer on the agbrs.dev/crash website and the agb-debug cli tool will be able to parse the debug information out of the gba file.
Note that this will quite drastically increase the size of your .gba file and it could end up getting close to the cartridge size limits.
Configuring the target website
The target website can be configured by setting the AGBRS_BACKTRACE_WEBSITE environment during the build.
# Direct players to your website
AGBRS_BACKTRACE_WEBSITE="https://example.com/test#" cargo build

# Don't have a website at all. The QR code will just be the ID
AGBRS_BACKTRACE_WEBSITE="" cargo build
To completely disable the backtraces, you can disable the backtrace feature in agb by editing your Cargo.toml as follows:
# Disable the `backtrace` feature
agb = { version = "...", default-features = false, features = ["testing"] }
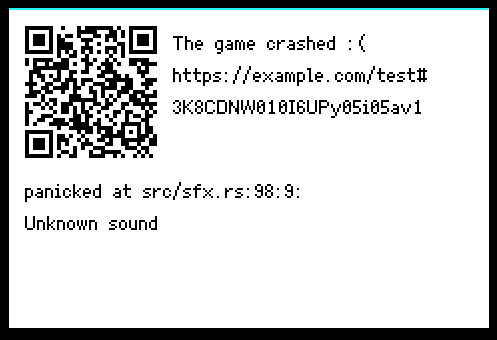 Custom website configured
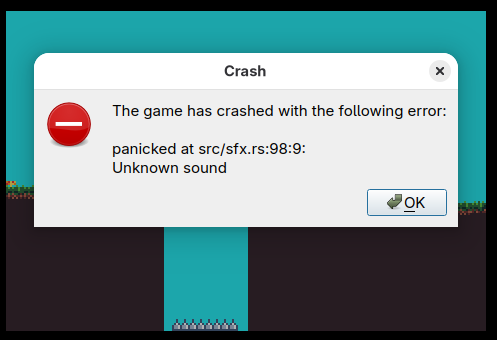 Backtraces disabled, the game just freezes
Tiled backgrounds
Tiled backgrounds are used to show the backdrop of games, along with any other mostly-static content such as heads-up-displays (HUDs) or menus. They are used in almost every commercial GBA game. In a tiled background, the background is made of individual 8x8 tiles which can be repeated as many times as needed.
The reason you’d need to use a tiled background is because of how much RAM and CPU time it takes to display a GBA-screen sized background. They also allow for easy scrolling, and with reused tiles you can update large amounts of the screen very efficiently.
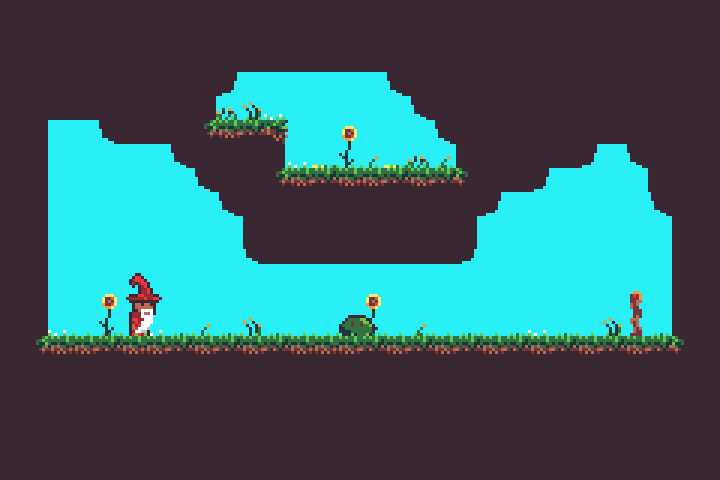
In the example above, you can see repeated tiles used for the brown background along with the flowers, grass and ground. The only part of the above example that isn’t a background is the wizard on the left and the slime in the centre.
The following sections build up an example showing a simple scene.
If you want to follow along, you can download beach-background.aseprite from here.
Copy this into a gfx folder in the same directory as the src directory for your project.
Tile set importing
In order to display tiles on the screen, we’ll first need to import it into the game.
A collection of imported tiles is referred to as a TileSet.
You wouldn’t normally create a TileSet manually, and instead have it created using the include_background_gfx! macro.
agb natively supports importing aseprite, png or bmp files for backgrounds.
The syntax is as follows:
use agb::include_background_gfx;

include_background_gfx!(
    mod background,
    BEACH => deduplicate "gfx/beach-background.aseprite"
);
This creates a background module which contains a tileset named BEACH.
The deduplicate parameter means that agb will take tiles with the same content and merge them into the same tile.
This saves space in the final ROM, and saves video RAM during runtime, since duplicate tiles will only appear once.
Palette setup
Although the Game Boy Advance can display 32,768 colours, the background tiles are stored in either 4 bits per pixel (16 colours) or 8 bits per pixel (256 colours).
You will need to tell the video hardware what colour to use for each of the pixels in the TileSet.
This is stored in the palette, which is also included in the module created by include_background_gfx!.
To set the palettes available for backgrounds, use the set_background_palettes method on the Graphics instance.
use agb::{
    include_background_gfx,
};

include_background_gfx!(
    mod background,
    BEACH => deduplicate "gfx/beach-background.aseprite"
);

#[agb::entry]
fn main(mut gba: agb::Gba) -> ! {
    let mut gfx = gba.graphics.get();
    gfx.set_background_palettes(background::PALETTES);

    loop {}
}
If you need to change individual palette colours after initialisation (for example, to animate the background colour or to change the background to a new set of palettes), you can use the set_background_palettes() method on the current GraphicsFrame. This will change the palettes at the same time as the background swap rather than at the call (so on .commit()).
RegularBackground
With a TileSet ready and a palette set up, we need to actually declare which tiles to show where on the screen.
This is done using the RegularBackground struct.
The RegularBackground reserves some video RAM to store which tile goes where and other metadata about it like it’s palette number and whether it should be flipped.
RegularBackground::new takes 3 arguments.
The priority (which we’ll set to Priority::P0 for now), a tile format which you can get from background::BEACH.format() and a size.
The size of the background can be one of 4 values.
The Game Boy Advance has a screen size of 240x160 pixels which is equal to 30x20 tiles, and the smallest background is 32x32 tiles.
Backgrounds can be scrolled around, and will wrap around the screen if the edge of the background is out of view.
The bigger the background, the more video RAM will get used by both the tiles within it (since each tile in a background must be stored in vram, even if it isn’t currently visible on the screen) and also more video RAM is needed to store the actual list of tile indices.
In most cases, Background32x32 is the best choice since you can cover the entire screen and it uses very little video RAM.
 However, there are also cases where other sizes are a good choice.
The example to the right uses a `64x32` background to implement the parallax background.
However, there are also cases where other sizes are a good choice.
The example to the right uses a `64x32` background to implement the parallax background.
For this example, we’ll just create a 32x32 background, but it is important to always consider the background size when creating one in your game.
use agb::{
    display::Priority,
    display::tiled::{
        RegularBackground, RegularBackgroundSize,
    },
    include_background_gfx,
};

include_background_gfx!(
    mod background,
    BEACH => deduplicate "gfx/beach-background.aseprite"
);

#[agb::entry]
fn main(mut gba: agb::Gba) -> ! {
    let mut gfx = gba.graphics.get();
    gfx.set_background_palettes(background::PALETTES);

    // Create the background tiles ready for us to display on the screen
    let mut tiles = RegularBackground::new(
        Priority::P0,
        RegularBackgroundSize::Background32x32,
        background::BEACH.tiles.format()
    );

    loop {}
}
You’ll now want to put tiles onto the background, ready to display them.
This is done using the set_tile() method.
Let’s loop over the width and height of the Game Boy Advance screen and set the tile in the background, so after the tiles are created, something like:
for y in 0..20 {
    for x in 0..30 {
        let tile_index = y * 30 + x;

        tiles.set_tile(
            (x, y),
            &background::BEACH.tiles,
            background::BEACH.tiles.tile_settings[tile_index],
        );
    }
}
If the included .aseprite file is the exact dimensions of the GBA screen
(240x160 pixels), you can also simply call .fill_with()
on the RegularBackground you created with a reference to the imported TileSet:
tiles.fill_with(&background::BEACH);Note that if you run either approach, you still won’t get anything showing on screen until you show the background on the frame, which we’ll do in the next section.
Showing a background on the screen
To show a background on the screen, you’ll need to to call the .show() method passing in the current GraphicsFrame.
See the frame lifecycle article for more information about frame lifecycles, but to show our example so far, replace the loop with the following
let mut gfx = gba.graphics.get();

loop {
    let mut frame = gfx.frame();
    background.show(&mut frame);
    frame.commit();
}
Background scrolling
One of the key things you can use backgrounds to do is to display something scrolling. You can use this to make your level bigger than the world map, or to do some parallax effect in the background.
You can scroll the background with the .set_scroll_pos() method.
The scroll_pos passed to the .set_scroll_pos() method is effectively the ‘camera’ position.
It chooses where the top left camera position should be.
So increasing the x coordinate will slide the background to the right, to ensure that the top-left corner of the Game Boy Advance’s screen is at that pixel.
Backgrounds will wrap around if they are pushed off the edge of the screen. See the scrolling example for an example of using the scroll position.
Multiple backgrounds and priorities
The Game Boy Advance has the ability to show up to 4 background concurrently. These can be layered on top of each other to create different effects like the parallax effect above or to always show certain things above the rest of the game.
Displaying multiple backgrounds
You can display multiple backgrounds at once by calling the .show() method on each background passing the same frame instance.
If you try to show more than 4 backgrounds, then the call to .show() will panic.
Transparency
When two backgrounds are rendered on top of each other, the lower background will be visible through the transparent pixels in the backgrounds above. Only full transparency is supported, partial transparency is ignored.
Any pixels with no background visible at all will be displayed in the first colour in the first palette.
You can alter what colour this is in the include_background_gfx! call.
use agb::{
    include_background_gfx,
};

include_background_gfx!(
    mod background,
    "00bdfe", // the hex code of the sky colour we want to use as the background layer
    BEACH => deduplicate "gfx/beach-background.aseprite"
);

#[agb::entry]
fn main(mut gba: &mut agb::Gba) -> ! {
    let mut gfx = gba.graphics.get();
    // by setting the background colour here, the first colour will be the sky colour,
    // so rather than filling the screen with black you will now instead have it
    // filled with blue. Even though we don't show anything yet.
    gfx.set_background_palettes(background::PALETTES);

    loop {}
}
There is also a special tile setting you can use in the call to set_tile(), TileSetting::BLANK.
This is a fully transparent tile, and if you ever want a tile in your background to be fully transparent, it is better to use this one for performance.
Priority and interaction with objects
There are 2 things which impact which background gets displayed above other ones.
The priority, and the order in which you call .show().
Backgrounds with higher priorities are rendered first, and so are rendered behind those with lower priorities.
Between backgrounds with the same priority, the one which called .show() first will render before (and therefore behind) the later ones.
When interacting with objects, objects with the same priority as backgrounds are always displayed above the background. You can use this to display the Heads Up Display (HUD) above the player by putting the HUD background on priority 0, the main background on priority 3 and the player also on priority 3.
See the hud example for an example of how to use priorities to draw a heads up display above the scene we’ve been working on.
Infinite maps
Often in your game you’ll want maps that are larger than the maximum background size of 64x64. It could be a platformer with large levels, or a large map in an RPG. Or maybe you want a scrolling background that’s got a longer repeat than every 64 tiles.
The InfiniteScrolledMap is a used to manage a map that’s larger than the background size.
It works by changing the tiles that aren’t currently visible on the screen and then allowing you to scroll to them.
This creates a seamless, ‘infinite’ map.
The key method in InfiniteScrolledMap is the .set_scroll_pos() method.
This method takes a position to scroll to and a function which accepts a scroll position (working in the same way as the regular .set_scroll_pos() on a RegularTiledBackground) and a callback function.
The callback function is called for every tile it needs to fill with some data, which will be as minimal as possible and attempt to reuse already drawn tiles.
So the .set_scroll_pos() method assumes that this function is pure, and the same between calls.
See the infinite scrolled map example for an example of how to use it with a large static map.
In the example linked above, the map tiles are larger than the provided background size (60x40 vs. 32x32), but could still fit in a 64x64 space. Using the infinite scrolled map however allows us to wrap the background at the edge of this provided background rather than being forced to wrap it at 64 tiles wide. This will also use less video RAM while the game is running since we need fewer tiles loaded at once to fill the screen.
Generally, when you’re working with InfiniteScrolledMaps, you’ll want to use 32x32 backgrounds as the underlying size, since there is very little advantage to using larger backgrounds.
256 colours
So far every example has used 16-colour tiles or 4 bits per pixel.
Each tile in a 16-colour tile can have at most 16 colours, but you can use different palettes for each tile.
Most of this has been hidden by the include_background_gfx! macro.
However, it does limit the number of colours you can have in your background a little. If you need to bypass this limit, you can use 256 colour tiles (or 8 bits per pixel). This has the disadvantage that it takes twice as much video RAM to store the tile data, but the advantage that it gives you more freedom as to how to put the colours in your background.
Import a 256 colour background by adding the 256 modifier to the call to include_background_gfx!().
use agb::include_background_gfx;

include_background_gfx!(
    mod background,
    BEACH => 256 deduplicate "gfx/beach-background.aseprite"
);
Also ensure that when you create the RegularBackground, you pass TileFormat::EightBpp (or using the .format() method on the tile data like we’ve been using in the other examples here).
A background must be in one of FourBpp or EightBpp mode.
Tile effects
Each tile in the Game Boy Advance can be flipped horizontally or vertically.
This is controlled by the .vflip and .hflip methods on TileSetting.
You can also set the palette index using the TileSetting.
But for backgrounds imported using include_background_gfx!() you probably don’t need that, since the palettes will have been optimised and aren’t guaranteed to be the same each time you compile your game.
Animated tiles
If you have some tiles you’d like to animate (such as some flowing water, or flowers blowing in the breeze), it can be quite inefficient to replace every instance of a tile with the animation every frame. What’s much faster is just replacing the one copy of the tile that’s been repeated across the background 10s or even 100s of times rather than resetting the entire tile data.
To change which tile is being used, use the replace_tile method on the Graphics instance.
gfx.replace_tile(
    tileset1, 4, tileset2, 5
);
This will replace every occurrence of tileset1’s tile 4 with tileset2’s tile 5.
Animated tiles work on tile indexes and only change the tile data itself and not the state of the tiles used.
The tiles being replaced will retain their hflip and vflip, so you can animate tiles in transformed states.
Therefore, animated tiles do not work with the deduplicate option in include_background_gfx!(), since this will flip tiles in order to reduce the number of exported tiles.
It will also not change the palette index for those tiles, so only animate tiles which result in the same palette index.
See this example for an example of an animated background in a very basic example.
Dynamic tiles
Sometimes you don’t know what needs to be drawn on a tile ahead of time.
DynamicTiles are a powerful way to show tiles whose contents are decided at runtime in your game.
Their current main use is for text rendering, where they are used as the target for rendering text.
Currently only 16-colour dynamic tiles are supported and can only be shown on 4 bits per pixel backgrounds via the set_tile_dynamic16() method on RegularBackground.
// by default, `DynamicTile`s are left with whatever was in video RAM before it
// was allocated. So you'll need to clear it if you're not planning on writing
// to the entire tile.
let dynamic_tile = DynamicTile16::new().fill_with(0);

// my_background here must have FourBpp set as it's TileFormat or you won't be able
// to use DynamicTile16 on it.
let my_background = RegularBackground::new(
    Priority::P0,
    RegularBackgroundSize::Background32x32,
    TileFormat::FourBpp
);

// Note that you can pass a TileEffect here which would allow you to flip the tile
// vertically or horizontally if you choose to.
my_background.set_tile_dynamic16((0, 5), dynamic_tile, TileEffect::default());
my_background.set_tile_dynamic16((0, 5), dynamic_tile, TileEffect::default().hflip(true)); // flip the tile horizontally
See the dynamic tiles example for a really basic example, or the tiled background text renderer for a much more in-depth example. If you have any examples where dynamic tiles are the correct tool which isn’t font rendering, please let us know by opening an issue in the agb repo.
Affine backgrounds
The Game Boy Advance can perform basic transformations like rotation and scaling to backgrounds and objects before they are displayed on screen. These transformations are used to perform many of the graphical tricks which give Game Boy Advance games their unique aesthetic.
Affine background limitations
One thing to note before using affine backgrounds for everything in your game is that they come with some fairly strict limitations which make them harder to use than regular backgrounds
- You can have at most 2 affine backgrounds at once. Each affine background takes up 2 regular background slots, so you can have 2 affine backgrounds, 1 affine and 2 regular or 4 regular backgrounds.
- Affine backgrounds only support 256-colour mode (8 bits per pixel).
Therefore, each tile uses up more video RAM than using the normal 16-colour mode (4 bits per pixel).
So make sure to import tiles using the 256 colour option in
include_background_gfx!. However, this isn’t so much of a problem because: - Affine backgrounds can only have 256 distinct tiles. Whereas regular backgrounds can fill the entire screen with distinct tiles, affine backgrounds can’t. 256 tiles runs out very quickly. And to make matters worse:
- Affine background tiles cannot be flipped. Each tile appears as it does when copied over to video RAM. So you cannot use the same deduplicate trick used in regular backgrounds.
However, if you can work around these limitations, you’ll have the ability to make graphical effects like the ones shown in the affine backgrounds example, where we add a subtle camera rotation and zoom while moving around. Do note that these limitations are actual hardware limitations1.
Affine background creation
Before we dig into the transformations themselves, we’ll quickly cover how to create and display affine backgrounds.
Importing the graphics
Affine background tiles are imported using the same include_background_gfx! macro as regular backgrounds.
However, ensure that you pass the 256 option to import them as 256-colour tiles, and that you do not pass the deduplicate option.
use agb::include_background_gfx;

include_background_gfx!(
    mod background,
    TILES => 256 "gfx/background-tiles.aseprite",
);
Setup the palette
Palette setup works in exactly the same way as regular backgrounds.
gfx.set_backgroud_palettes(background::PALETTES);Create the AffineBackground
These also work very similarly to regular backgrounds.
However, the constructor for AffineBackground takes some different arguments.
The priority works in exactly the same way as regular backgrounds, with higher priorities being rendered first, so backgrounds with the lower priority are drawn on top of backgrounds with a higher priority.
And similarly, objects with the same priority as an affine background are rendered above the background.
The sizes available to affine backgrounds are different to regular backgrounds. Affine backgrounds can only be square, and the smallest one (16x16 tiles) is smaller than the console’s screen and the largest (128x128 tiles) is many times the size. You have similar trade-offs with the amount of video RAM used for the actual background data as with regular backgrounds. You should use the smallest background you can which fits the game you’re making on it.
While all regular backgrounds wrap around the screen (so scrolling to the right far enough will eventually show the left hand side of the background), affine backgrounds have the option not to wrap around the screen.
This is provided by the AffineBackgroundWrapBehaviour.
Play around with some of the affine background examples to see how changing these settings alters how it works.
Putting tiles on screen
The set_tile method takes different arguments to the regular background case.
Instead of taking TileSettings, you give it a single tile_index.
This is due to the limitation of affine backgrounds that you cannot flip tiles, so there are no settings to tweak.
Showing the background on the screen
As with most graphical things in agb, you show AffineBackground on the screen by calling the .show() method passing in the current frame.
let mut gfx = gba.graphics.get();

loop {
    let mut frame = gfx.frame();
    background.show(&mut frame);
    frame.commit();
}
Transformations
Please see the dedicated affine backgrounds and objects chapter to see how to do transformations.
-
Technically you could have 256 distinct tiles per affine background so you could get 512 total between both backgrounds. However,
agb’s tile allocation isn’t sophisticated enough for this, and you would also need to specify at creation time whether you’d want this because you could not deduplicate between the backgrounds. To avoid this complication,agbdoesn’t support this mechanism. ↩
Objects deep dive
An object is a sprite drawn to an arbitrary part of the screen. They are typically used for anything that moves such as characters and NPCs. All objects can be flipped and affine objects can have an affine transformation applied to them that can rotate and scale them.
Importing sprites
Sprites are imported from aseprite files. Aseprite is an excellent pixel sprite editor that can be acquired for around $20 or compiled yourself for free. It also provides features around adding tags for grouping sprites to form animations and dictating how an animation is performed. The aseprite documentation contains detail on tags. This makes it very useful for creating art for use by agb.
You can import 15 colour sprites using the include_aseprite macro.
In a single invocation of include_aseprite the palettes are all optimised together.
For example, you might use the following to import some sprites.
agb::include_aseprite!(mod sprites, "sprites.aseprite", "other_sprites.aseprite");This will create a module called sprites that contains statics corresponding to every tag in the provided aseprite files as an agb Tag.
You can also import 255 colour sprites using the include_aseprite_256 macro, which has the same syntax as include_aseprite!().
You have 15 colour and 255 colours because the 0th index of the palette is always fully transparent.
Similar to backgrounds, 255 colour sprites take twice the amount of video RAM and cartridge ROM space, so prefer using 15 colour sprites as they are faster to copy and you will be able to have more of them on screen at once.
Importing other image formats
You can also import gif, png, and bmp files.
The name of the static corresponds to the name of the file and is formatted in all capitals with hyphens replaced by underscores.
agb::include_aseprite!(mod sprites, "my_sprite.png", "other-image.bmp");This would produce 2 statics, sprites::MY_SPRITE and sprites::OTHER_IMAGE.
gif files produce a Tag with multiple frames.
To produce multiple frames from a png or bmp file you should use sprite splitting.
Splitting large frames into smaller sprites
The GBA only supports specific sprite sizes (up to 64x64). If your aseprite file has frames larger than you’d like for individual OAM objects, you can specify a target sprite size before the file path to automatically split each frame into multiple smaller sprites.
The size is written as WIDTHxHEIGHT and must be a valid GBA sprite size.
You may also specify just the width and the height is then inferred.
The frame dimensions must be evenly divisible by the target size.
Sub-frames are generated in row-major order (left-to-right, top-to-bottom), and tags are automatically adjusted to cover all sub-frames.
agb::include_aseprite!(
    mod sprites,
    32x16 "big_character.aseprite",
    16 "character_strip.png",
    "small_item.aseprite"
);
In this example, each frame of big_character.aseprite is split into 32x16 sub-sprites, character_strip.png has a width of 16 with an inferred height, and small_item.aseprite is imported at its native size.
Note that the animation helpers on Tag (such as .animation_sprite() and .animation_frame()) will iterate over individual sub-frames, not complete original frames.
You will likely want to use .sprite() directly to display all the sub-frames that make up a single original frame yourself.
ROM and VRAM
Sprites must be in VRAM to be displayed on screen.
The SpriteVram type represents a sprite in VRAM.
This implements the From trait from &'static Sprite.
The From implementation will deduplicate the sprites in VRAM, this means that you can repeatedly use the same sprite and it’ll only use the space in VRAM once.
This deduplication does have the performance implication of requiring a HashMap lookup, although for many games this will a rather small penalty.
By storing and reusing the SpriteVram you can avoid this lookup.
Furthermore, SpriteVram is reference counted, so Cloneing it is cheap and doesn’t allocate more VRAM.
use agb::display::object::SpriteVram;

agb::include_aseprite!(mod sprites, "examples/chicken.aseprite");

let sprite = SpriteVram::from(sprites::IDLE.sprite(0));
let clone = sprite.clone();
Regular objects
When you have a sprite, you will want to display it to the screen.
This is an Object.
Like many things in agb, you can display to the screen using the show method on Object on the frame.
use agb::display::{GraphicsFrame, object::Object};

agb::include_aseprite!(mod sprites, "examples/chicken.aseprite");

fn chicken(frame: &mut GraphicsFrame) {
    // Object::new takes anything that implements Into<SpriteVram>, so we can pass in a static sprite.
    Object::new(sprites::IDLE.sprite(0))
        .set_pos((32, 32))
        .set_hflip(true)
        .show(frame);
}
Animations

With your sprites organised in tags, you can use the .animation_sprite() method to get the specific frame for the animation.
This method takes into account the ‘animation direction’ and correctly picks the frame you would want to show.
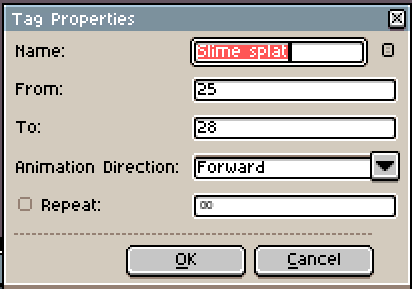
Often you’ll want to divide the current frame by something to show the animation at a speed that is less than 60 frames per second.
For example, if you wanted to display the ‘Walking’ animation from above, you would use something like this:
use agb::display::{GraphicsFrame, object::Object};

agb::include_aseprite!(mod sprites, "gfx/sprites.aseprite");

fn walk(frame: &mut GraphicsFrame, frame_count: usize) {
    // We divide the frame count by 4 here so that we only update once
    //  every 4 frames rather than every frame.
    Object::new(sprites::WALKING.animation_sprite(frame_count / 4))
        .set_pos((32, 32))
        .show(frame);
}
Object ordering
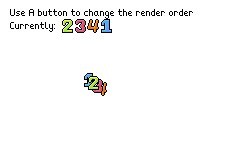
When rendering multiple objects in the same location, one will show above another.
The one shown on top is the one object that has had the .show() method called first.
From the example, the number 2 is rendered first, followed by 3, 4 and then 1. The number 2 is rendered on top, and if the 1 and the 3 were to overlap then the 3 would be shown above the 1 in addition to the 4 it is visibly covering.
If your game requires many objects to have a correct covering order, you should ensure you call the .show() method in the correct order.
Normally this will be calling .show() on objects with the greatest y value first.
You may want to call .sort_by_key() with the y value being the key before showing the objects.
It is important that you do not use an unstable sort here, since that could cause z-fighting as objects with the same y value could get sorted to a different location each frame, causing them to change render order each frame.
Affine objects

Affine objects can be rotated and scaled by an affine transformation.
These objects are created using the ObjectAffine type.
This, like an Object, requires a sprite but also requires an AffineMatrixObject and an AffineMode.
The affine article goes over some detail in how to create affine matrices.
With a given affine matrix, you can use AffineMatrixObject::new or the From impl to create an AffineMatrixObject.
When using the same affine matrix for multiple sprites, it is important to reuse the AffineMatrixObject as otherwise you may run out of affine matrices.
You can use up to 32 affine matrices at once.
AffineMatrixObject implements Clone, and cloning is very cheap as it just increases a reference count.
An AffineMatrix also stores a translation component.
However, creating the AffineMatrixObject will lose this translation component, so you’ll also need to set it as the position as follows:
let affine_matrix = calculate_affine_matrix();
let affine_matrix_instance = AffineMatrixObject::new(affine_matrix);

ObjectAffine::new(sprite, affine_matrix_instance, AffineMode::Affine)
    .set_pos(affine_matrix.position().round())
    .show(frame);
Be aware that the position of an affine object is the centre of the sprite, and not the top left corner like it is for regular sprites.
Affine objects have two display modes, regular and double mode. In regular mode, the objects pixels will never exceed the original bounding box (which you can see in the image above). Double mode allows for the sprite to be scaled to twice the size of the original sprite.
You can see the behaviour of affine modes more interactively in the affine objects example.
Affine objects can be animated in the same way as regular objects, by passing a different sprite to the new function.
Dynamic sprites
A dynamic sprite is a sprite whose data is defined during runtime rather than at compile time.
agb has two kinds of dynamic sprites: DynamicSprite16 and DynamicSprite256.
These are naturally for sprites that use a single palette and those that use multiple.
The easiest way to create a dynamic sprite is through the relevant type, here is an example of creating a DynamicSprite16 and setting a couple of pixels.
use agb::display::{
    Palette16, Rgb15,
    object::{DynamicSprite16, Size},
};

let mut sprite = DynamicSprite16::new(Size::S8x8);
static PALETTE: Palette16 = const {
    let mut palette = [Rgb15::BLACK; 16];
    palette[1] = Rgb15::WHITE;
    Palette16::new(palette)
};

sprite.set_pixel(4, 4, 1);
sprite.set_pixel(5, 5, 1);

let in_vram = sprite.to_vram(&PALETTE);
And you could then go on to use the sprite however you like with Object as normal.
For example
Object::new(in_vram).set_pos((10, 10)).show(&mut frame);How to handle the camera position?
In many games, you will have objects both in screen space and in world space. You will find that to correctly draw objects to the screen you will need to convert world space coordinates to screen spaces coordinates before showing it. The position of your “camera” needs to be propagated to where the object is shown. There are many ways of achieving this, the simplest being wherever you create your object you can pass through a camera position to correct the position
use agb::{
    fixnum::{Vector2D, Num},
    display::{
        GraphicsFrame,
        object::Object,
    },
};

struct MyObject {
    position: Vector2D<Num<i32, 8>>
}

impl MyObject {
    fn show(&self, camera: Vector2D<Num<i32, 8>>, frame: &mut GraphicsFrame) {
        Object::new(SOME_SPRITE).set_pos((self.position - camera).round()).show(frame);
    }
}
While you can get the position of an Object, do not try using this to correct for the camera position as it will not work.
The precision that positions are stored in the Object are enough to be displayed to the screen and not much more.
Trying to use this for world coordinates will fail.
See also
- The pong tutorial goes over the basics of sprites.
Fixed point numbers
When writing games you’ll often find yourself needing to represent fractional numbers. For example your player might not want to accelerate at whole numbers of pixels per second. Commonly on desktop computers and modern games consoles, to do this you would use floating point numbers. However, floating point numbers are complex and require special hardware to work efficiently. The Game Boy Advance doesn’t have a floating point unit (FPU) so any use of floating point numbers in your game will have to be emulated in software. This is very slow, and will reduce the speed of your game to a crawl.
The solution to this problem is to have a fixed point number rather than a floating point number.
These store numbers with a fixed number of bits of precision instead of allowing the precision to vary.
While you lose the ability to store very small and very large numbers, arithmetic operations like + and * become as fast (or almost as fast) as working with integers.
Storing the coordinates as a fixed point integer is often referred to as the sub-pixel value in retro games communities.
But this book refers to them as ‘fixed point integers’ or ‘fixnums’.
Fixnums - Num<T, N>
The main type for interacting with fixnums is the Num<T, N> struct found in agb::fixnum::Num.
T is underlying integer type for your fixed point number (e.g. i32, u32, i16) and N is how many bits you want to use for the fractional component.
So you’ll often see it written as something like Num<i32, 8>.
We recommend using i32 (or u32 if you never need the number to be negative) as the primitive integer type unless you have good reason not to.
It is harder to provide general advice for how many fractional bits you will need.
The larger N is, the more precise your numbers can be but it also reduces the maximum possible value.
The smallest positive number that can be represented for a given N will be 1 / 2^N, and the maximum number will be type::MAX / 2^N.
You should use an N that is less than or equal to half the number of bits in the underlying integer type, so for an i32 you should use an N of at most 16.
In general, 8 bits offers a good middle ground, allowing for 1/256 precision while still allowing for a range of -8388608..8388608 with i32.
The original Super Mario Bros has 16 sub pixels, which would correspond to an N of 4.
That was designed to run on a 8-bit processor, so you might as well use a few more.
Creating fixnums in code
The num! macro
The num! macro is useful if you want to represent your fixnum as a floating point number in your code.
You’ll often see it when you want to pretend that the code you’re working with is actually working as a floating point.
For example:
use agb::fixnum::num;

fn do_some_calculation(input: Num<i32, 8>) -> Num<i32, 8> {
    input * num!(1.4)
}
will multiply the input by 1.4 (as a fixnum value).
You must specify the type being produced, or it must be inferred elsewhere.
So in the example above, it is inferred that the type is Num<i32, 8> but the following example is incorrect:
use agb::fixnum::num;

let jump_speed = num!(1.5); // this is incorrect
Instead, you should specify the type:
use agb::fixnum::{num, Num};

let jump_speed: Num<i32, 8> = num!(1.5); // this is now correct
Num::new()
You can also call the new() method on Num which accepts an integer.
This is mainly useful if you want a fixnum with that value.
use agb::fixnum::Num;
let jump_speed: Num<i32, 8> = Num::new(5);
Note that you will either need to have the number of fractional bits be inferred, or use the turbo fish operator
use agb::fixnum::Num;
let jump_speed = Num::<i32, 8>::new(5);
.into()
You can also create integer valued fixnums using .into().
use agb::fixnum::Num;
// these are equivalent
let jump_speed: Num<i32, 8> = 5.into();
let jump_speed: Num<i32, 8> = Num::from(5);
Arithmetic
Fixnums can be used in arithmetic in the ways you would expect. They also work with integers directly, so the following examples are all valid:
use agb::fixnum::{num, Num};
let speed: Num<i32, 8> = num!(5);
let distance: Num<i32, 8> = num!(1);

let position = distance + speed * 3;
let position = distance + speed * num!(1.5);
There are many more useful methods on Num (like .sqrt(), .abs()), so check out the
documentation for the full list.
Division with fixnums
The Num type supports standard division using the / operator with both other fixnums, or integers.
 use agb::fixnum::{Num, num};

let distance: Num<i32, 8> = num!(25.0);
let time: Num<i32, 8> = num!(2.0);
let speed = distance / time;

agb::println!("Distance: {}", distance);
agb::println!("Time: {}", time);
agb::println!("Speed: {}", speed);

let scaled_distance = distance / 4; // Dividing by an integer
agb::println!("Distance divided by 4: {}", scaled_distance);
When performing division, it is most efficient to do the division with a power of 2 (2, 4, 8, 16, 32, …) rather than any other value. Division by a power of 2 will be optimised by the rust compiler to a simple shift, whereas other constants are much more computationally intensive. It is okay to do a few divisions by non-power of 2 values per frame, but it is around 20 times less efficient, so keep them to a small number per frame.
Therefore, when designing your game logic, especially performance-critical sections that many times every frame, try to structure calculations such that divisions are primarily done using powers of two.
For instance, if you need to scale a value by a factor that isn’t a power of two, consider whether you can achieve a similar effect by dividing by a near power of 2 (so if you wanted to divide by 10, can you get away with dividing by 8 instead?).
You can also multiply by the inverse if the precision is okay. Rather than dividing by 10, instead multiply by num!(0.1).
Bridging back into integers
Often you’ll have something calculated using fixed points (like the position of a player character) and you’ll want to now display something on the screen.
Because the screen works in whole pixel coordinates, you’ll need to convert your fixnums into integers.
The best method for this is the .round() method because it has better behaviour when approaching the target integer.
Vector2D and Rect
In addition to the Num type, agb::fixnum also includes a few additional types which will be useful in many applications.
Vector2D<T> works with both Num and primitive integer types and provides a 2 dimensional vector.
Rect<T> similarly works with both Num and primitive integer types and represents an axis aligned rectangle.
Vector2D<T>
Vector2D can be used to represent positions, velocities, points etc.
It implements the arithmetic operations addition and multiplication by a constant, allowing you to write simpler code when dealing with 2d coordinates.
The main way to construct a Vector2D<T> is via the vec2 helper method in agb::fixnum::vec2, but Vector2D also implements From<(T, T)> which means that you can pass 2-tuples to methods which require impl Into<Vector2D<T>>.
As an example, here is some code for calculating the final location of an object at a time time given a starting location and a velocity.
use agb::fixnum::{Num, num, Vector2D, vec2};

fn calculate_position(
    initial_position: Vector2D<Num<i32, 8>>,
    velocity: Vector2D<Num<i32, 8>>,
    time: Num<i32, 8>
) -> Vector2D<Num<i32, 8>> {
    initial_position + velocity * time
}

assert_eq!(
    calculate_position(
        vec2(num!(5), num!(5)), // you can use the vec2 constructor
        (num!(0.5), num!(-0.5)).into(), // or `.into()` on 2-tuples
        num!(10)
    ),
    vec2(num!(10), num!(0))
);
Like Num, Vector2D also provides the .round() which is the method you should use if converting back into integer coordinates (like setting the position of an object given fixnum positions before).
See the Vector2D documentation for more details.
Rect<T>
Rect<T> is an axis aligned rectangle that can be used to represent hit boxes.
It is represented as a position and a size.
For the purpose of hit boxes, the most useful method is the touches method that is true if the two rectangles are overlapping.
use agb::fixnum::{Rect, rect, vec2};

let r1 = rect(vec2(1, 1), vec2(3, 3));
let r2 = rect(vec2(2, 2), vec2(3, 3));
let r3 = rect(vec2(-10, 2), vec2(3, 3));

assert!(r1.touches(r2));
assert!(!r1.touches(r3));
See the Rect documentation for more details.
See also
Text rendering
There are many techniques for displaying text using agb with varying levels of support.
Perhaps the simplest is to produce sprites or background tiles that contain text that you show using the usual means.
This technique can get you very far!
For instance: text in title screens, options in menus, and any text in the HUD could (and as we will discuss, should) all be pre-rendered.
For detail on how to do these, see the backgrounds or objects articles.
What we will discuss here is dynamic rendering of text. Where the text can be decided at runtime.
agb text rendering principles
The text rendering system in agb has support for:
- Unicode
- Variable size letters
- Kerning
- Left, right, centre, and justified alignments
- Left to right text only
However, text rendering on the GBA is slow. Even just laying the text out, deciding where to put each character, is slow. For this reason, the API for text rendering is designed to spread work over multiple frames as much as possible. This naturally results in the effect of only adding a couple characters each frame that is so common in games even today. If you instead want to display text instantly, consider pre-rendering it.
The text rendering system is split into the layout and the backend renderers.
The Layout is an iterator of LetterGroup which stores a group of characters and where they should be displayed providing a pixels iterator which gives an iterator over all the pixels to render.
This includes any detail around kerning, alignment, etc.
With these letter groups, you can pass them to the Object or Tile based renderers. The tile based renderer takes a reference to a regular background and displays the letters given by the group on it. The object based render takes the letter group and gives back an object that represents that letter group.
Font
Importing a font is done using the include_font macro.
TTF fonts
For TTF fonts, pass the path to the .ttf file and the font size:
static FONT: Font = include_font!("fnt/ark-pixel-10px-proportional-latin.ttf", 10);You can find pixel fonts with many under permissive licenses on this website.
Pixel fonts from JSON
If you have created your own pixel font as an image, you can use YAL’s Pixel Font Converter to generate a JSON description of it. This tool lets you define a font from an image including variable sized letters and kerning pairs. It also lets you export the settings as a JSON file which we encourage you to keep in version control.
To use the JSON format, pass the path to the .json file and the path to the image:
static FONT: Font = include_font!("my_font.json", "my_font.png");An example of importing fonts this way is in the json_font_render example.
Layout
The Layout is an Iterator over LetterGroups.
A LetterGroup is a set of letters to be drawn at once.
The Layout handles correctly positioning the letter groups including performing line breaks where required and correctly aligning the text.
It does this incrementally, doing as little work as possible to generate the next groups position.
let text_layout = Layout::new(
    "Hello, this is some text that I want to display!",
    &FONT,
    &LayoutSettings::new()
        .with_alignment(AlignmentKind::Left)
        .with_max_group_width(32)
        .with_max_line_length(200),
);
If you’d like your text to include a drop-shadow (as seen in this example), then also call .with_drop_shadow() method passing in the palette index of the drop shadow:
let text_layout = Layout::new(
    "Hello, this is some text that I want to display!",
    &FONT,
    &LayoutSettings::new()
        .with_alignment(AlignmentKind::Left)
        .with_max_group_width(32)
        .with_max_line_length(200)
        .with_drop_shadow(2),
);
The drop-shadow will always be rendered one pixel to the right and one pixel down from the pixels of the text.
Colour changes
To have multiple colours in your text, you can use ChangeColour.
const COLOUR_1: ChangeColour = ChangeColour::new(1);
const COLOUR_2: ChangeColour = ChangeColour::new(2);

let text = format!("Hey, {COLOUR_2}you{COLOUR_1}!",);
You might want to use static text rather than using Rust’s text formatting, in that case see the documentation for ChangeColour where it documents the exact code points you need to use.
The drop shadow colour cannot be changed throughout the text.
Tags
You might want to treat certain parts of your text differently to other parts. Maybe some text should wiggle around, maybe some text should be delayed in the time taken to display it. You can encode this user state using the tag system.
The tag system gives 16 user controllable bits that you can set and unset during processing of text.
Here’s a simple example that shows how this works with LetterGroups.
const MY_TAG: Tag = Tag::new(0);
// set the tag with `set` and unset with `unset`.
let text = alloc::format!("#{}!{}?", MY_TAG.set(), MY_TAG.unset());
let mut layout = Layout::new(
    &text,
    &FONT,
    &LayoutSettings::new()
        .with_alignment(AlignmentKind::Left)
        .with_max_group_width(32)
        .with_max_line_length(100),
);

// get whether the tag is set with `has_tag` on `LetterGroup`.
assert!(!layout.next().unwrap().has_tag(MY_TAG));
assert!(layout.next().unwrap().has_tag(MY_TAG));
assert!(!layout.next().unwrap().has_tag(MY_TAG));
which can be extended within your text display system.
A complete example of this can be seen in the advanced object text rendering example.
If you want to use Tags without using Rust’s text formatting, the documentation for Tag documents the exact code points you need to use.
Renderers
The groups that come from the Layout can be used in the render backends.
There is a backend for displaying text using Objects and another for using background tiles.
ObjectTextRenderer
The ObjectTextRenderer takes in a LetterGroup and gives back an Object that represents that group.
To create one, you need to provide a palette and the size of sprites to use.
It is important that the size of sprite is greater than or equal to the maximum group size that is specified in the Layout.
A simple example of the ObjectTextRender would look like
let text_layout = Layout::new(
    "Hello, this is some text that I want to display!",
    &FONT,
    &LayoutSettings::new()
        .with_alignment(AlignmentKind::Left)
        .with_max_group_width(16) // minimum group size is 16, so the sprite size I use should be at least 16 wide
        .with_max_line_length(200),
);

// using an appropriate sprite size, palette should come from somewhere
let text_render = ObjectTextRenderer::new(PALETTE.into(), Size::S16x16);
let objects: Vec<_> = text_layout.map(|x| text_render.show(&x, vec2(16, 16))).collect();

// then show the objects in the usual way
The full example can be found in the object_text_render_simple example.
Normally you would divide this work over multiple frames. This is to minimise the work for layout and rendering which could otherwise cause frames to be skipped or audio to be skipped.
// use the standard graphics system
let mut gfx = gba.graphics.get();

// this is now mutable as we will be calling `next` on it
let mut text_layout = Layout::new(
    "Hello, this is some text that I want to display!",
    &FONT,
    &LayoutSettings::new()
        .with_alignment(AlignmentKind::Left)
        .with_max_group_width(16)
        .with_max_line_length(200),
);

let text_render = ObjectTextRenderer::new(PALETTE.into(), Size::S16x16);
let mut objects = Vec::new();

loop {
    // each frame try to grab a letter group and add it to the objects list
    if let Some(letter) = text_layout.next() {
        objects.push(text_render.show(&letter, vec2(16, 16)));
    }

    let mut frame = gfx.frame();

    // render everything in the objects list
    for object in objects.iter() {
        object.show(&mut frame);
    }

    frame.commit();
}
The full example for this pattern can be found in object_text_render_intermediate.
One of the main reasons to use objects for your text is to be able to individually manipulate your objects to create special effects.
The object_text_render_advanced example showcases this use case.
RegularBackgroundTextRenderer
You can also put text on a background.
This you provide with a RegularBackground and a LetterGroup and it will display that LetterGroup on that RegularBackground.
let mut bg = RegularBackground::new(
    Priority::P0,
    RegularBackgroundSize::Background32x32,
    TileFormat::FourBpp,
);

let text_layout = Layout::new(
    "Hello, this is some text that I want to display!",
    &FONT,
    &LayoutSettings::new()
        .with_alignment(AlignmentKind::Left)
        .with_max_group_width(32)
        .with_max_line_length(200),
);

// this takes the position of the text and the colour palette to use
let mut text_renderer = RegularBackgroundTextRenderer::new((4, 0), 0);

for letter in text_layout {
    text_renderer.show(&mut bg, &letter);
}
Normally you will want to split this over multiple frames to prevent skipped frames or audio skipping.
let mut bg = RegularBackground::new(
    Priority::P0,
    RegularBackgroundSize::Background32x32,
    TileFormat::FourBpp,
);

let mut text_layout = Layout::new(
    "Hello, this is some text that I want to display!",
    &FONT,
    &LayoutSettings::new()
        .with_alignment(AlignmentKind::Left)
        .with_max_group_width(32)
        .with_max_line_length(200),
);

let mut text_renderer = RegularBackgroundTextRenderer::new((4, 0), 0);

loop {
    if let Some(letter) = text_layout.next() {
        text_renderer.show(&mut bg, &letter);
    }

    let mut frame = gfx.frame();

    bg.show(&mut frame)

    frame.commit();
}
This can be found in the background_text_render example.
Custom
LetterGroups provide a pixels method which is an iterator over all the pixels that need to be set to draw those characters.
Using this you can have your own backends to render text however you want.
For example, you could use this to create your own effect similar to the no game example but with dynamic text.
Blending and windows
Blending and windows are basic graphical effects you can apply to backgrounds and objects to change how they appear on screen. Blending is used to fake transparency, or to fade the screen towards certain colours. Windows can be used to change what is actually rendered to the screen in certain places.
Blending
Blending lets you apply a few effects to the screen as almost a post-process step. You can use it to create a lightning effect or just to make an object slightly transparent.
There are a few things you can do with blending which enables you to emulate alpha transparency effects along with a few other basic effects. The two key concepts that you need to keep in mind with any blending effect are:
- Blending a a single global property. So if you want some level of alpha transparency, then everything with alpha transparency enabled will have the same level of transparency. Similarly, you can only apply 1 blend effect at once. So if you want to fade something to white, then you cannot have alpha transparency.
- Blending happens between two layers.
Layers here are more abstract.
They can be any subset of the currently rendered backgrounds.
But only objects with a
GraphicsModeset toAlphaBlendingwill be counted towards the layer which has objects enabled.
To configure blending, call the .blend() method on the current frame.
Nothing will change on the screen until the call to frame.commit().
You can only have one blending style at a time, and each time you call frame.blend().<style>(), you overwrite the previous one.
Object transparency
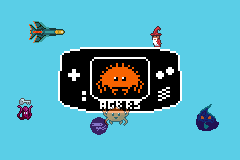
You can make all objects with the GraphicsMode set to AlphaBlending to be partially transparent using the .object_transparency() blending.
In the example on the right, the lower crab is blending into the background below it.
The object_transparency() method takes 2 arguments, which are the two alpha values.
The returned struct has the method enable_background() which you will need to call on any background you want to blend the object into.
For any pixel on which an object is being drawn on top of a background, the final colour will be:
\[ \text{min}(\alpha_0 * \text{object_pixel} + \alpha_1 * \text{background_pixel}, 31) \]
Where \( \alpha_0 \) is the first argument to object_transparency and \( \alpha_1 \) is the second.
Normally you would want \( \alpha_0 + \alpha_1 = 1 \) but that isn’t strictly necessary and you can use this to cause other effects like over-saturating certain colours.
// Fetch the background ID to enable this background for object transparency
let background_id = background.show(&mut frame);

// Ensure that the sprite has it's graphics mode set to `AlphaBlending` or
// it won't blend
Object::new(sprite)
   .set_graphics_mode(GraphicsMode::AlphaBlending)
   .show(&mut frame);

// Enable blending and make objects appear at 50% transparency by taking
// half the colour from the object and half the colour from the background.
frame.blend()
   .object_transparency(num!(0.5), num!(0.5))
   .enable_background(background_id);
Brighten / darken
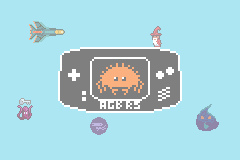
This is the simplest blend effect.
You can fade given layer towards black or white with the .brighten() or .darken() methods.
In the example to the right, the background is being faded towards white.
The .brighten() and .darken() take a single argument, which is how much to fade.
0 will leave it un-touched and 1 will result in fully black or white.
Only the enabled backgrounds will fade. For objects, things are a little more complicated.
You can enable objects for fading with the .enable_object() method, and in that case, any object with their GraphicsMode set to AlphaBlending will fade towards either black or white by the given amount.
However, you can also enable object transparency when enabling fade blending, which works like the section above.
But, if you have object fading and object transparency enabled, then any part of the object which overlaps with the background it is being faded into will show with transparency, but any object which doesn’t overlap with the background will be faded.
// Fetch the background ID to enable this background for object transparency
let background_id = background.show(&mut frame);

// Lighten the background quite close to white
frame.blend()
   .brighten(num!(0.75))
   .enable_background(background_id);
Alpha blending
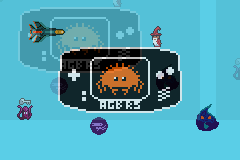
Alpha blending lets you blend one layer into another using the same idea as object transparency. However, with alpha blending, you can also blend backgrounds into each other, as shown in the example to the right where two identical offset backgrounds are faded into each other.
Alpha blending will only ever blend things from the top layer into the bottom layer.
And only items which in Priority order render the top layer above the bottom layer.
If you don’t do that, then no blending will occur.
To start alpha blending, call the .alpha() method on the blend, passing \( \alpha_\text{top} \) and \( \alpha_\text{bottom} \) as its two arguments.
You then need to configure the two layers which will be blended into each other by calling the various method on the BlendAlphaEffect.
use agb::display::Layer;

// This background has priority 0
let bg0_id = background0.show(&mut frame);
// This background has priority 1
let bg1_id = background1.show(&mut frame);

frame.blend()
   .alpha(num!(0.75), num!(0.25))
   .enable_background(Layer::Top, bg0_id)
   .enable_background(Layer::Bottom, bg1_id);
You can also enable objects on any layer with the enable_object() method.
Do note however that blending does not work between two objects, only background-background, object-background and background-object blending works.
An option for the layer is the backdrop.
This is the 0th colour in the palette, and what you select as the transparent colour in the call to include_background_gfx!.
It is always rendered behind everything, so enabling it in the top layer will not do anything.
But you can use it to fade towards a single colour.
You can change this colour at any time using
frame.set_background_palette_colour(0, 0, new_colour);Windows
Windows on the Game Boy Advance are used to selectively enable or disable certain backgrounds, objects or effects on some rectangular area of the screen. You can use them to only enable blending in certain areas rather than the entire screen, or to cut off a background in some location.
There are two rectangular windows and an object window. We’ll cover the rectangular ones first.
Window areas
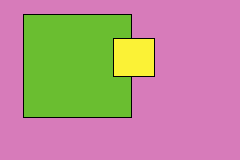
On the right you’ll see a diagram of how the two rectangular areas work on the Game Boy Advance.
Yellow is Win0 and green is Win1.
For each window, you can state what you would like to be visible within that space, this being specific backgrounds, objects or if blending should be enabled.
A certain pixel will always be a member of one of Win0 or Win1 (with Win0 taking priority over Win1), or it’ll be outside of both.
The special WinOut (the pink area in the diagram) is any pixel which isn’t in a window.
The WinOut is also configurable in the same way as the Win0 and Win1 windows are.
If you don’t configure anything to render in a certain window area, then it’ll only show the backdrop colour.
Windows are configured using the .windows() method on the current frame.
let bg1_id = background1.show(&mut frame);
let bg2_id = background2.show(&mut frame);

let mut window = frame.windows();
window
    .win_in(WinIn::Win0)
    .enable_background(bg1_id)
    .set_pos(rect(pos, vec2(64, 64)));

window.win_out().enable_background(bg2_id);
Here we enable background 1 inside Win0 and background 2 inside WinOut so outside of the 64x64 area we see background2 but inside this area we see background1.
Object windows
You can also use objects as a window.
Any non-transparent pixel in the object will be considered part of that window.
Mark an object you want to become a window with the GraphicsMode of Window.
Then, configure the win_obj() in the same way that you would the rectangular ones.
Again, anything not inside the object windows, or Win0 and Win1 will be considered part of WinOut and is configured using the .win_out().
Music and sound effects
No game is complete without music and sound effects. The Game Boy Advance doesn’t have built-in hardware support for sound mixing, so in order to play more than one sound at once, you’ll need to use a software mixer.
agb’s built-in software mixer allows for up to 8 simultaneous sounds to be played at once at various speeds and volumes.
It also (through the agb-tracker crate) can play basic tracker music. Usage of both will be covered in this article.
Choice of frequency
agb’s mixer works at a fixed frequency which you choose when creating it.
Once chosen, you cannot change the frequency during the game without first dropping the mixer.
There are 3 supported frequencies, with higher frequencies having noticeably better sound quality but using significantly more CPU. The following is just an indication as to how much CPU time per frame will be used by audio, actual results will vary greatly depending on the number of channels currently playing and what they are playing.
One thing to note here is that the actual hardware has a very poor speaker, and even through the headphones it has quite a lot of noise. And with how little CPU time there is, and the fact that the audio hardware produces 8-bit audio1, don’t expect amazing sound.
| Frequency | Audio quality | Approximate CPU usage for 4 channels |
|---|---|---|
| 10,512Hz | Poor - even bad out of the speakers | ~5% per frame |
| 18,157Hz | Low - speakers sound fine but headphones are still a little crunchy | ~10% per frame |
| 32,768Hz | Medium - speakers sound great and headphones are fine | ~20% per frame |
Preparing the samples
The CPU on the Game Boy Advance isn’t powerful enough to decompress audio while also being able to play a game at the same time. So all audio is stored uncompressed, making them quite big. For a lot of games, most of the space in the ROM is taken up by music and sound effects.
agb only supports wav files for uncompressed audio.
And they are not resampled before loading, so you must ensure that the wav files are at the sample rate you’ve chosen for your game.
You can use ffmpeg to resample any audio to your chosen frequency (and convert to a wav file) like follows:
ffmpeg -i path/to/audio.mp3 -ar 18157 sfx/audio.wav
Loading the sample
You can load the sample by using the include_wav! macro.
This returns a SoundData which you can later pass to the mixer to play.
use agb::{
    include_wav,
    sound::mixer::SoundData,
};

static BACKGROUND_MUSIC: SoundData = include_wav!("sfx/audio.wav");
Managing the mixer
In order to actually play the music, you’ll need a sound mixer which you can get from the Gba struct.
This is where you pass your chosen frequency.
use agb::sound::mixer::Frequency;

let mut mixer = gba.mixer.mixer(Frequency::Hz18157);
Now that you have the mixer, you need to call .frame() at least once per frame.
If you don’t do that, then the audio will ‘skip’, which is very noticeable for players.
loop {
    let mut frame = gfx.frame();
    // do your per-frame game update stuff

    mixer.frame();
    frame.commit();
}
Playing sounds
Music and sound effects are treated in the same way. The mixer manages a number of concurrent channels which will all play at once. There can be at most 8 channels playing.
Create a new channel by constructing a new SoundChannel.
let mut background_music = SoundChannel::new(BACKGROUND_MUSIC);
background_music.stereo();
There are various methods you can use to change how the sound channel is played. For example, you can change its volume, or the speed at which it is played (effecting the pitch).
Then, play the sound with:
mixer.play_sound(background_music);This function returns an Option<ChannelId>.
You will get Some if there was a free space for this channel to be played, and you can later retrieve this same channel using mixer.channel(channel_id) in case you want to change how it is being played, or to stop it.
Sound playback settings
There are few things you can tweak about how the sound effect is played which is useful in games. Note that if you are playing stereo sound, you cannot change any of these properties, and any attempt to do so will be ignored.
- Pitch.
You can change the pitch by using the
.playback()method, which takes a speed as a fixnum for how fast this sample should be played.1is unchanged,2is double speed etc. - Volume.
You can change the volume by using the
.volume()method, which takes the new volume as a fixnum.1is unchanged,0.5is half volume etc. Setting this too high will cause clipping in the final audio. - Panning.
This will change the volume on a per-side basis, and is changed using the
.panning()method. On actual Game Boy Advance hardware, there is only 1 speaker, so this only works on emulators or if the player has headphones.-1is fully to the left,1is fully to the right and0is the default and plays centrally.
Modifying playing sounds
With a given ChannelId retrieved from the call to play_sound(), you can alter how the sound effect is played.
The mixer.channel(channel_id) method will return the SoundChannel and then you can apply the effects mentioned above to change how it is played.
The .stop() method will cause this channel to stop playing and free it up for a different one.
This is useful for level transitions to stop the background music from playing once you’re done with it.
And there is .pause() and .resume() which doesn’t free up the current channel, and allows you to resume from where you left off at a later point.
Sound priorities
By default, sounds are ‘low priority’.
These will not play if there are already 8 sounds playing at once.
You can also state that your channel is ‘high priority’.
These will always play (and .play_sound() will panic if it can’t find a slot to play this sound effect), and will remove low priority sounds from the playing list if there isn’t currently space.
You should only use high priority sounds for important things, like required sound effects and your background music (if you’re not using a tracker).
Create a high priority channel with SoundChannel::new_high_priority().
let mut background_music = SoundChannel::new_high_priority(BACKGROUND_MUSIC);
background_music.stereo();
Tracker music
You’ll find you run out of ROM space very quickly if you start including high quality audio for all the background music you want. For example, even just 4 minutes of music at 32,768Hz will take up about 10MB of space (maximum cartridge size is 32MB with most being 16MB). So ideally you’d want to make your music take up less space.
For that, you use tracker music. This stores individual samples of each instrument, along with instructions on what volume and pitch to play each note. These take up much less space than full, uncompressed audio. Using tracker music, you could reduce the same 4 minutes of music to just a few kilobytes.
Creating tracker files is outside the scope of this book, but often you would use a tool like Milkytracker or OpenMPT to compose your music.
agb has good support for the xm file format (native to milkytracker and an option for OpenMPT).
To get tracker support, include the agb-tracker crate as follows:
cargo add agb_tracker
Then import your xm background music
use agb_tracker::{Track, include_xm};

static BGM: Track = include_xm!("sfx/bgm.xm");
For each track you want to play at once, you need an instance of the Tracker.
use agb_tracker::Tracker;

let mut bgm_tracker = Tracker::new(&BGM);
You can now play this background music using the step() function which you would call at some point before the .frame() function on the mixer.
bgm_tracker.step(&mut mixer);
mixer.frame();
The Tracker will manage playing the various samples from the xm file at the right time, pitch and volume.
Because it uses the mixer under-the-hood, the xm file can play at most 8 samples at once, and each of those samples take up a slot for sound effects.
This is also more CPU intensive then just playing a single sound effect as the background music because more channels are being used at once.
The actual book-keeping that the Tracker needs to do on a per-frame basis to play the music is fairly lightweight.
-
Technically there’s a trick you can use to get 9-bit audio out of the Game Boy Advance. You will be limited to mono only if you use that trick, and it uses large quantities of ROM space to store the extra information that it generally isn’t worth it. ↩
Saving and loading
Most games need to save the player’s progress so they can continue where they left off.
The Game Boy Advance supports several types of save media, each with different characteristics.
agb provides a single, opinionated API over all of the different types of save media.
API overview
The save system is built around the SaveSlotManager.
This gives you:
- Multiple save slots - like in a classic RPG where you can have multiple independent saves
- Corruption detection - if saving fails part way through,
agbwill load the most recent successful save - Metadata separation - each save slot has a ‘summary’ which is loaded immediately.
Why separate metadata and data?
The save system separates each slot into two parts, metadata and data.
Metadata
Metadata is small information about a save that you want to display in a save slot selection screen e.g. the player’s name, playtime, current level, amount of gold they have. This is loaded into memory when the save system initializes, so you can display all slots without any additional reads from save media.
Data
Data is the full game state - e.g. inventory, quest progress, world state. This is only loaded when the player actually selects a slot, since it can be much larger and reading from save media (especially EEPROM and Flash) is slow.
This design means your save selection menu can show “Slot 1: Alice - Level 42 - 12:34” instantly, without having to load each save file to extract that information.
How to use save slots
Save slots work like the save systems in classic RPGs:
- New game: When starting a new game, let the player choose an empty slot (or overwrite an existing one)
- Saving: Write to the player’s chosen slot whenever they save
- Loading: Show all slots with their metadata, let the player pick one, then load the full data
A typical game might use 3-4 slots. More slots require more save media space for slot headers and metadata, so don’t use more than you need.
If you don’t want to use save slots, then set the number of slots to 1. You’ll still get the benefits of corruption prevention and won’t need to worry about save slots.
Save media types
Game Boy Advance cartridges can contain different types of save media:
| Media type | Size | Speed | Notes |
|---|---|---|---|
| SRAM | 32 KiB | Fast | Battery-backed RAM, simplest to use |
| EEPROM 512B | 512 B | Slow | Very limited space, cheap |
| EEPROM 8K | 8 KiB | Slow | Limited space, cheap |
| Flash 64K | 64 KiB | Read fast | Writes are slow, good for larger saves |
| Flash 128K | 128 KiB | Read fast | Writes are slow, best for large saves |
For most games, SRAM is the easiest choice if you need up to 32KB of save data. If you need more space, use Flash. EEPROM is mainly used because it’s cheap, but the limited space makes it challenging to work with - EEPROM 512B in particular can barely fit a single save slot with minimal data.
If you are wanting to run your game on a flash cart (like the ez flash), then you should configure your game to use SRAM. If you want to write your game to override a bootleg cartridge, then those use often use flash, and provide you with lots of space to store your save data.
Setting up saving
First, define your save data structure using serde for serialization.
If you want to display information about save slots (e.g., player name, playtime) without loading the full save, you can also define a metadata structure:
use serde::{Deserialize, Serialize};

/// Metadata shown in save slot selection screens (optional)
#[derive(Clone, Serialize, Deserialize)]
struct SaveMetadata {
    player_name: [u8; 8],
    play_time_minutes: u32,
}

/// The actual game save data
#[derive(Clone, Serialize, Deserialize)]
struct SaveData {
    level: u32,
    score: u32,
    inventory: [u16; 20],
}
Initializing the save system
Initialize the save system by calling one of the init_* methods on gba.save.
This returns a SaveSlotManager that you’ll use for all save operations.
use agb::save::SaveSlotManager;

// A unique 32-byte identifier for your game.
// If this doesn't match what's stored, the save is considered incompatible
// and will be reformatted. Change this when your save format changes
// in a backwards-incompatible way.
//
// During development, it can be useful to set this to e.g. the current git
// commit hash. That way wheneven you change the format of the `Savemetadata`
// or `SaveData`, provided you commit your changes it'll automatically invalidate
// all existing save files.
const SAVE_MAGIC: [u8; 32] = *b"my-awesome-game-v1______________";

#[agb::entry]
fn main(mut gba: agb::Gba) -> ! {
    // Initialize SRAM with 3 save slots
    let mut save_manager: SaveSlotManager<SaveMetadata> = gba
        .save
        .init_sram(
            3,              // number of save slots
            SAVE_MAGIC,     // game identifier
        )
        .expect("Failed to initialize save");

    // Your game loop...
}
For Flash or EEPROM, you may want to provide a timer for timeout handling:
let timers = gba.timers.timers();
let mut save_manager: SaveSlotManager<SaveMetadata> = gba
    .save
    .init_flash_128k(3, SAVE_MAGIC, Some(timers.timer2))
    .expect("Failed to initialize save");
The available initialization methods are:
init_sram(num_slots, magic)- For SRAMinit_eeprom_512b(num_slots, magic, timer)- For 512B EEPROMinit_eeprom_8k(num_slots, magic, timer)- For 8K EEPROMinit_flash_64k(num_slots, magic, timer)- For 64K Flashinit_flash_128k(num_slots, magic, timer)- For 128K Flash
Writing save data
Use the write() method to save data to a slot:
let save_data = SaveData {
    level: 5,
    score: 12500,
    inventory: [0; 20],
};

let metadata = SaveMetadata {
    player_name: *b"Player1\0",
    play_time_minutes: 45,
};

save_manager
    .write(0, &save_data, &metadata)  // write to slot 0
    .expect("Failed to save");
The save system is designed to be crash-safe. If the game crashes or loses power during a write, the previous save data will be recovered on the next load.
Reading save data
Use the read() method to load save data:
let loaded: SaveData = save_manager
    .read(0)  // read from slot 0
    .expect("Failed to load save");
You can check the status of a slot before reading:
use agb::save::Slot;

match save_manager.slot(0) {
    Slot::Valid(metadata) => {
        let data: SaveData = save_manager.read(0).expect("Failed to load");
        // Use the loaded data...
    }
    Slot::Empty => {
        // No save data, start a new game
    }
    Slot::Corrupted => {
        // Save data is corrupted, cannot be recovered
        // This can happen if save media is damaged or
        // if a crash occurred and recovery failed
    }
}
Displaying save slots
For a save slot selection screen, you can iterate over all slots:
use agb::save::Slot;

for slot in save_manager.slots() {
    match slot {
        Slot::Valid(metadata) => {
            // Display: "Player1 - 45 min"
            // metadata is available directly
        }
        Slot::Empty => {
            // Display: "Empty"
        }
        Slot::Corrupted => {
            // Display: "Corrupted"
        }
    }
}
The metadata is read during initialisation, so accessing it doesn’t require reading from save media.
Erasing a save slot
To delete a save slot:
save_manager.erase(0).expect("Failed to erase slot");Error handling
Save operations can fail for various reasons.
The SaveError enum describes what went wrong:
SlotEmpty- Tried to read from an empty slotSlotCorrupted- The slot data is corruptedOutOfSpace- Not enough free space for the writeSerializationFailed- Failed to serialize the dataDeserializationFailed- Failed to deserialize the dataStorage- Low-level storage error
For a real game, you’d want to handle these gracefully:
use agb::save::SaveError;

match save_manager.read::<SaveData>(0) {
    Ok(data) => {
        // Use the loaded data
    }
    Err(SaveError::SlotEmpty) => {
        // Start a new game
    }
    Err(SaveError::SlotCorrupted) => {
        // Offer to start fresh or try another slot
    }
    Err(SaveError::OutOfSpace) => {
        // Save media is full - ask user to delete old saves
    }
    Err(e) => {
        // Handle other errors
        agb::println!("Save error: {:?}", e);
    }
}
Space considerations
The save system has some overhead beyond your actual save data:
- A header sector for the magic identifier
- A slot header for each slot (stores metadata and data locations)
- Checksums for corruption detection
For most save media types this overhead is negligible, but for EEPROM 512B (only 512 bytes total), you may only be able to fit a single slot with very small data.
If you’re targeting EEPROM 512B, you may not be able to store anything in data and put everything in metadata.
Use unit () as your data type.
Save file upgrades
You may want to provide the ability for your save file to be upgraded to newer versions. This is possible, but you have to do some additional work yourself to make it happen.
The Metadata type is fixed, and must be the same when loading data.
However, the Data type is not fixed.
Which Data type you deserialize from is up to you, and can depend on the metadata for that save slot.
So you could store the version in the Metadata type and then load a different save version depending on what you find there.
Further reading
SaveSlotManagerdocumentationSaveManagerdocumentation- serde documentation for custom serialization
Unit tests
It is possible to write unit tests using agb.
Installing the mgba-test-runner (technically optional)
Firstly you’ll need to install the mgba-test-runner which requires cmake and libelf installed via whichever mechanism you use to manage software, along with a C and C++ compiler.
Then run
cargo install --git https://github.com/agbrs/agb.git mgba-test-runner
Running unit tests
Running just cargo test will launch the test in mgba, which isn’t particularly useful.
To run the test using the test runner installed in step 1, use the following command:
CARGO_TARGET_THUMBV4T_NONE_EABI_RUNNER=mgba-test-runner cargo test
Writing unit tests
If you don’t already have this in your main.rs file from the template, you need the following at the top to enable the custom test framework.
#![cfg_attr(test, feature(custom_test_frameworks))]
#![cfg_attr(test, reexport_test_harness_main = "test_main")]
#![cfg_attr(test, test_runner(agb::test_runner::test_runner))]
Then, you can write tests using the #[test_case] attribute:
#[test_case]
fn dummy_test(_gba: &mut Gba) {
    assert_eq!(1, 1);
}
Tests take a mutable reference to the Gba struct.
There is no equivalent to #[should_panic] so these style of tests are not (currently) possible to write using agb.
If you want to check that the screen has pixels as expected, you can use the assert_image_output method.
This only works when running the unit test under the mgba-test-runner installed in step 1.
#[test_case]
fn test_background_shows_correctly(gba: &mut Gba) {
    let mut gfx = gba.graphics.get();

    // you should never assume that the palettes are set up correctly in a test
    gfx.set_background_palettes(...);

    let mut frame = gfx.frame();
    show_some_background(&mut frame);
    frame.commit();

    assert_image_output("src/tests/test_background_shows_correctly.png");
}
If the mentioned png file doesn’t exist, then the mgba-test-runner will create the file.
Subsequent runs will compare the current screen with the expected result and fail the test if it doesn’t match.
Interpreting test output
When running unit tests, you’ll get output that looks similar to this:
agb::display::blend::test::can_blend_affine_backgrounds...[ok: 1757950c ≈ 0.1s ≈ 625% frame]
agb::display::blend::test::can_blend_affine_object_to_black...[ok: 1656122c ≈ 0.1s ≈ 589% frame]
agb::display::blend::test::can_blend_object_shape_to_black...[ok: 1392767c ≈ 0.08s ≈ 496% frame]
agb::display::blend::test::can_blend_object_to_black...[ok: 1400985c ≈ 0.08s ≈ 498% frame]
agb::display::blend::test::can_blend_object_to_white...[ok: 1401004c ≈ 0.08s ≈ 498% frame]
It starts with the test name, and then lists something like [ok: 1757950c ≈ 0.1s ≈ 625% frame].
This means it took 1,757,950 CPU cycles to run the test, or about 0.1 seconds or 6.25 frames.
Any test which uses assert_image_output() will automatically take a few frames.
Doc tests
To write a doctest for your game in agb, create a function and mark it with the #[agb::doctest] attribute macro.
/// This is a cool rust function with some epic documentation which is checked
/// at compile time and the doctest will run when running the tests.
///
/// ```rust
/// # #![no_std]
/// # #![no_main]
/// #
/// # #[agb::doctest]
/// # fn test(gba: agb::Gba) {
/// assert_eq!(my_crate::my_cool_function(), 7);
/// # }
/// ```
fn my_cool_function() -> i32 {
    return 7;
}
You probably want to hide the boilerplate for the doctest as shown above to make it easier for your users to understand the relevant section.
These will run by default when running the cargo test command listed above, and you can run them explicitly with
CARGO_TARGET_THUMBV4T_NONE_EABI_RUNNER=mgba-test-runner cargo test --doc
Affine backgrounds and objects
The Game Boy Advance can perform basic transformations like rotation and scaling to backgrounds and objects before they are displayed on screen. These transformations are used to perform many of the graphical tricks which give Game Boy Advance games their unique aesthetic.
Note that this article will assume familiarity with vectors and matrix mathematics. If these are new to you, you should first understand the basics of linear algebra before delving much deeper into this topic.
Game Boy Advance affine transformations
The transformations supported by the Game Boy Advance are affine transformations1. The technical definition is that affine transformations preserve lines and parallelism. However, it might be easiest to think of affine transformations as any combination of the following transformations:
| Transformation | Description |
|---|---|
| Translation | Moving the item |
| Scaling | Changing the size of the item |
| Rotation | Rotating the item |
| Shear | Turning rectangles into parallelograms |
Below is (from left to right) untransformed, scaled, rotated and sheared.

You can see all these transformations in action in the affine transformations example.
The most important thing to note about transformation matrices in the Game Boy Advance is that they are inverted.
What we mean by this is that if you’re looking to double the size of an object, you may construct a matrix like the following:
\[ \begin{pmatrix} 2 & 0 \\ 0 & 2 \end{pmatrix} \]
However, if you do this, your object will actually shrink to half its size.
This is because rather than mapping object locations to screen locations, the Game Boy Advance instead uses the transformation matrices to map screen locations to object locations.
So in order to double the size of the object, you’ll need to use a matrix with 0.5 in the diagonal.
agb does not hide this from you and automatically invert the matrices because inverting a matrix in fixed point numbers still involves a division and can lose quite a lot of precision.
So you need to make sure that any matrix you pass is thought of as mapping pixels on the screen to the location in your object / background rather than from your object / background to pixels on the screen.
Affine matrices in agb
The key affine matrix type provided by agb is the AffineMatrix.
This represents the full affine transformation including translation, and provides a multiplication overload which you use to combine transformations.
For example, if we want to do both a rotation and a scale, you could use something like this:
use agb::{
    display::AffineMatrix,
    fixnum::{Num, num}
};

let rot_mat: AffineMatrix =
    AffineMatrix::from_rotation(num!(0.25));
let scale_mat: AffineMatrix =
    AffineMatrix::from_scale(vec2(num!(0.5), num!(0.5)));

let final_transform: AffineMatrix = rot_mat * scale_mat;
Remember that the transform is transforming screen coordinates to object coordinates. So this will first halve the size of the screen and then rotate it (effectively showing it at double the size).
You can construct an AffineMatrix for each of the basic transformations above.
All the fields are pub, so you can also construct one using:
use agb::display::AffineMatrix;

let mat = AffineMatrix {
    a, b, c, d, x, y
};
which is the matrix:
\[ \begin{pmatrix} a & b & x \\ c & d & y \\ 0 & 0 & 0 \end{pmatrix} \]
Affine backgrounds
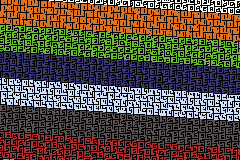
To create affine backgrounds, please see the relevant section in the backgrounds deep dive.
The screenshot to the right is from the affine background example.
You can apply a transformation matrix to an affine background using the .set_transform() method and passing in the desired affine matrix.
set_transform() takes an AffineMatrixBackground rather than an AffineMatrix directly because they have different size requirements.
You can convert from an AffineMatrix to an AffineMatrixBackground by using the from_affine() constructor or the .into() method.
The example above produces the AffineMatrixBackground directly using the from_scale_rotation_position() method.
let transformation = AffineMatrixBackground::from_scale_rotation_position(
    // we set the origin of the transformation to the middle of the screen
    position + vec2(num!(WIDTH), num!(HEIGHT)) / 2,
    // the zoom can be different on the x and y axis, but we don't want to do that here
    (zoom.change_base(), zoom.change_base()),
    // rotate slightly
    rotation,
    // put the background in the correct place
    -vec2(position.x.round() as i16, position.y.round() as i16)
        + vec2(WIDTH as i16, HEIGHT as i16) / 2,
);
bg.set_transform(transformation);
However, you can also build up the affine transformation matrix using the AffineMatrix for the same effect.
Affine objects
Affine objects behave slightly differently to backgrounds.
They only use the a, b, c and d components of the matrix and ignore the transformation part of it.
So you’ll also need to set the position of the sprite separately.
let affine_matrix = AffineMatrix::from_rotation(num!(0.25));
let affine_matrix_instance = AffineMatrixObject::new(affine_matrix);

ObjectAffine::new(sprite, affine_matrix_instance, AffineMode::Affine)
    .set_position(affine_matrix.position().round())
    .show(frame);
There is a limit of 32 distinct AffineMatrixObject instances at once, so you should reuse them between different objects if possible.
See the affine section of the object deep dive for more details.
-
There are tricks you can use to beat the affine transformations and have non-affine transformations. The 3d plane and pipe background examples show what you can do if you change the transformation matrix on every single scanline. ↩
DMA
DMA stands for ‘Direct Memory Access’ which doesn’t really explain what it does or what it is used for. It is a built-in component of the Game Boy Advance’s hardware which lets you copy memory from one location to another fairly efficiently.
In agb, DMA is mainly used for audio (behind the scenes in the mixer), but it can also be used for graphical effects, and we’ll refer to graphical effects which use DMA as a core component as ‘DMA effects’.
DMA is behind most of the ‘mode 7’ tricks in the Game Boy Advance, but can also be used for other graphical effects. Take a look at the DMA examples to see what can be possible with these effects.
 DMA used on the background's transformation matrix
 DMA is used to alter the bounding rectangle of a window each frame
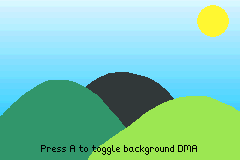 The sky gradient is created using DMA to use only 1 palette colour
 The wobble here is created using DMA on the x-displacement
 The monster is created by altering the x and y displacement and is only 6 distinct tiles.
 This 3d plane is created by altering the background's transformation matrix
How do DMA effects work?
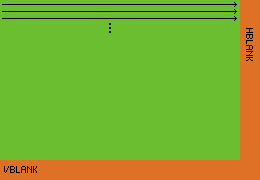
All the effects shown above use the same idea which is taking advantage of the fact that the Game Boy Advance renders the screen one row at a time.
To the right is a diagram which shows how the Game Boy Advances renders to the screen. There is a brief period of time (known as HBlank) where the screen is not being rendered to. The DMA effects take advantage of this brief window of time to change some value (like the current x, y scroll position of a background) just before that line is being rendered.
In agb, you have access to a single DMA effect each frame.
You can know if something is controllable each line by looking for methods which return a DmaControllable.
Note that DMA replaces the value stored in this location with it’s own value. So setting that value during the frame will get overwritten by the DMA effect.
Using DMA
Once you have a DmaControllable, you’ll want to actually be able to control it.
You do this by creating an instance of HBlankDma and calling the .show() method on it passing the current frame.
Because the Game Boy Advance has a vertical resolution of 160 pixels, there are 160 rows to do the DMA replacement with so you need to pass it a slice of at least 160 values which have the same type as the DmaControllable that you pass it.
A note on performance
Although these effects may look like they take a lot of CPU time, the only time actually being spent is creating the array of 160 values. If you can do as much of that work outside of your main game loop, then these effects are basically free.
Vertical gradients using a single palette colour
The background_palette_colour_dma() (and it’s companion the background_palette_colour_256_dma()) methods on GraphicsFrame let you control a single colour in a background palette on each line.
The main use for this is creating gradient patterns or applying effects which would take much more colours than is normally available in the 256 colour palette of the Game Boy Advance.
The DmaControllable for this is over a single Rgb15 representing the colour for that line.
use agb::{
    include_colours,
    dma::HBlankDma,
};

// The `include_colours!` macro returns an array of every colour used in the
// provided image file, from left to right, top to bottom including repeats.
static SKY_GRADIENT: [Rgb15; 160] =
    include_colours!("examples/gfx/sky-background-gradient.aseprite");

// The colour of the blue used in the background.
const DARKEST_SKY_BLUE: Rgb = Rgb::new(0x00, 0xbd, 0xff);

// Find the index of the colour because it could be anywhere in the palette
// (since the palette was created via `include_background_gfx!`).
let background_colour_index = frame
    .find_colour_index_16(0, DARKEST_SKY_BLUE.to_rgb15())
    .expect("Should contain the dark sky blue colour");

HBlankDma::new(
    frame.background_palette_colour_dma(0, background_colour_index),
    &SKY_GRADIENT,
)
.show(&mut frame);
If you wanted the colours to change per frame (or for example animate the gradient), you could pass some subslice to the HBlankDma::new() function (assuming that slice you create has at least 160 elements).
See the example for the full code listing.
x and y scroll DMAs for regular backgrounds
The simplest effects you can do with the x and y scroll DMAs are the magic spell and the desert heat wave examples.
These work by altering the x and y scroll values for each line to create this background effect.
You can control the scroll offset using DMA by using the x_scroll_dma() and y_scroll_dma() methods on RegularBackgroundId.
There is also the combined scroll_dma() function which lets you control both at the same time.
A key thing to note here is that the y value you set here to is not the y value from the background that’s used.
Instead, you are controlling the y-scroll value, so the current line is added to this value before this line is rendered.
This is different from the affine background transformation which will be covered later.
use alloc::{boxed::Box, vec::Vec};

use agb::{
    display::HEIGHT,
    dma::HBlankDma,
    fixnum::Num,
};

// Calculate this outside the loop because sin is a little slow
let offsets: Box<[Num<i32, 8>]> = (0..(32 * 8 + HEIGHT))
    .map(|y| (Num::new(y) / 16).sin())
    .collect();

loop {
    let mut frame = gfx.frame();
    let bg_id = background.show(&mut frame);

    // Calculate the y scroll value for the current frame
    let offsets: Vec<_> = (0..160)
        .map(|y| (offsets[y + frame_count] * 3).floor() as u16)
        .collect();

    HBlankDma::new(background_id.y_scroll_dma(), &offsets).show(&mut frame);
    frame.commit();
}
Non-rectangular windows
If you recall from the windows article, windows must be rectangular or created by an object.
However, the best way to create non-rectangular windows (such as the circular one in the example above) is by using DMA to change the boundaries of the window each row.
You can control the start and end horizontal points of either Win0 or Win1 by using the horizontal_pos_dma() method.
This only controls the horizontal position and not the vertical position, so you’ll need to ensure you’ve called .set_pos() on the window with the correct height before letting DMA take control of the width.
The circular window example shows how to use this trick to create a moving circular window which shows the background through it.
The key section is:
let mut frame = gfx.frame();
let background_id = map.show(&mut frame);

let window = frame.windows();

window
    .win_in(WinIn::Win0)
    .enable_background(background_id)
    // Here we set the height of the window. The horizontal position will
    // be overwritten by the HBlankDma below, but the vertical position is
    // important.
    .set_pos(rect(pos.floor(), vec2(64, 65)));

let dma_controllable = window.win_in(WinIn::Win0).horizontal_pos_dma();
HBlankDma::new(dma_controllable, &circle_poses).show(&mut frame);

frame.commit();
Non-affine transformations
The pipe effect
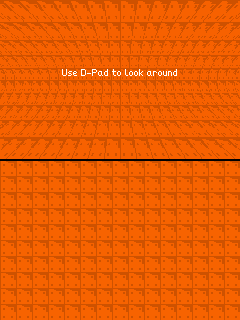
Affine transformations on backgrounds have the property that parallel lines remain parallel. However, this isn’t always the desired outcome in a game, especially one which wants to do pseudo-3d effects.
In the example to the right, above the line is how it finally renders and below is the actual background being used. Although the horizontal lines remain parallel, the vertical lines are not. This is an indication that DMA is changing the affine transformation each row.
The affine DMA transformations work differently from regular background transformations, mainly around the y value of the affine matrix.
Each time the affine matrix is set, it’ll reset the current ‘y counter’.
So each line is rendered almost as-if y = 0, and therefore you’ll often see y being added back on to compensate for this.
See the example code for the full listing, here are the key parts.
The key idea to notice here is that we want to scale the x-direction differently for each line. And also that we want the scaling to be relative to the center of the screen. This part will be the same each frame, so it is worth it to do as much as possible outside the loop for performance reasons.
let scale_transform_matrices = (0..160)
    .map(|y| {
        // theta here ranges from 0.0 to 0.5 for the various y values
        // so that sin produces a single up-down
        let theta: Num<i32, 8> = Num::new(y) / 160 / 2;
        // scale here is how much to stretch the x-axis
        let scale = (num!(2.1) - theta.sin()) * num!(0.5);

        // This is for the subtle y-scaling. You don't technically
        // need this and can use just `Num::new(y)` but this makes the
        // pipe effect more realistic.
        //
        // An interesting part here is that we are offsetting from `y` directly.
        // This is because the current `y` offset resets each time the transformation
        // matrix is updated by the DMA write. If this were a regular background
        // and you were controlling the current `y` scroll value, you would _not_
        // want to add the current `y` value.
        let y = Num::new(y) - (theta * 2).sin() * 8;

        // Remember that affine matrices work backwards, so this will move to the
        // middle and then increase the size by `scale`.
        AffineMatrix::from_scale(vec2(num!(1) / scale, num!(-1)))
            * AffineMatrix::from_translation(-vec2(num!(WIDTH / 2), y))
    })
    .collect::<Vec<_>>();
Now we do less work in the per-frame case:
let transforms = scale_transform_matrices
    .iter()
    .map(|&line_matrix| {
        AffineMatrixBackground::from(AffineMatrix::from_translation(pos) * line_matrix)
    })
    .collect::<Vec<_>>();
HBlankDma::new(transform_dma, &transforms).show(&mut frame);
By multiplying each entry by the current location (represented here by pos), we can add the illusion of movement to this example.
The 3d plane effect
You can see the full example here.
This effect is by far the most complex example in agb, and the explanation of the maths behind it can be found in the tonc article.
But the idea is the same as the pipe background.
Create a different transformation matrix to apply to the background for each row to create the 3d plane effect.
Using a debugger with VSCode
agb::println can get you quite far with debugging, but sometimes you will want a debugger.
VSCode and mGBA can work together to provide a debugger experience.
The template is configured for this by default on linux.
You’ll need the recommended extensions along with the debugger arm-none-eabi-gdb installed.
Pressing F5 will start the game with the debugger attached to it.
You can then add breakpoints to the code and step through.
This can, however, be rather difficult as we need to enable optimisations to have passable performance which causes vast areas of code to be optimised out and generally be reordered.
This works because of the launch.json and tasks.json files.
The tasks.json file specifies how to build the game, which is simply by calling cargo build.
While the launch.json specifies exactly how to launch the game and configure the debugger.
The
launch.jsonfile specifies the name of the binary directly, if you change the name of your crate you will need to change the names ofagb_templatein thelaunch.jsonfile.
Recommended extensions
There are two recommended extensions, rust-analyzer for a language server for Rust, and cpptools the C/C++ extension.
We want the C/C++ extension because it is what contains the support needed for launching the debugger.
tasks.json
We define a task to build the game in debug mode.
We explicitly state the target dir here because otherwise specifying your own would break things in the launch.json.
{
    "version": "2.0.0",
    "tasks": [
        {
            "label": "Rust build: debug",
            "command": "cargo",
            "args": [
                "build"
            ],
            "options": {
                "cwd": "${workspaceFolder}",
                "env": {
                    "CARGO_TARGET_DIR": "${workspaceFolder}/target"
                }
            }
        },
    ],
}
launch.json
Here we use the C/C++ extension to define a debugger that runs the game using mGBA with a gdb server (the -g option) and attaches arm-none-eabi-gdb.
If you do get this working for other platforms, please reach out to us so we can include the configuration in the template by default.
You’ll see in here we refer to the name of the crate directly, agb_template, so if you change the name of the crate you’ll need to change it in here too.
{
    "version": "0.2.0",
    "configurations": [
        {
            "name": "(gdb) Launch",
            "type": "cppdbg",
            "request": "launch",
            "targetArchitecture": "arm",
            "args": [],
            "stopAtEntry": false,
            "environment": [
                {
                    "name": "CARGO_TARGET_DIR",
                    "value": "${workspaceFolder}/target",
                },
            ],
            "externalConsole": false,
            "MIMode": "gdb",
            "miDebuggerServerAddress": "localhost:2345",
            "preLaunchTask": "Rust build: debug",
            "program": "${workspaceFolder}/target/thumbv4t-none-eabi/debug/agb_template",
            "cwd": "${workspaceFolder}",
            "linux": {
                "miDebuggerPath": "arm-none-eabi-gdb",
                "setupCommands": [
                    {
                        "text": "shell \"mgba-qt\" -g \"${workspaceFolder}/target/thumbv4t-none-eabi/debug/agb_template\" &"
                    }
                ]
            },
        },
    ],
}
Miscellaneous
This article covers topics which aren’t big enough to be their own section, but are worth covering in a smaller section here.
Printing to the console
If your game is running under the mGBA emulator then you can print to the console using the agb::println! macro.
So to print the text Hello, World!, you would do the following:
agb::println!("Hello, World!");The println! macro works the same way as the standard library println! macro.
However, you should note that formatting arguments is quite slow, so the main use for this is debugging, and you’ll probably want to remove them when actually releasing your game as they can make it so that your game logic doesn’t calculate within a frame any more.
Random numbers
agb provides a simple random number generator in agb::rng.
To generate a random number, you can either create your own instance of a RandomNumberGenerator, or use the global next_i32() method.
The Game Boy Advance has no easy way of seeding the random number generator, and creating random numbers which are different for each boot can be quite difficult.
One thing you can do to make random numbers harder to predict is to call the next_i32() method once per frame.
loop {
    let mut frame = gfx.frame();
    // do your game rendering

    frame.commit();

    // make the random number generator harder to predict
    let _ = agb::rng::next_i32();
}
HashMaps
alloc does not provide a HashMap implementation, and although you can import the no_std version of hashbrown, it can be quite slow on the Game Boy Advance due to its use of simd and other intrinsics which have to be emulated in software.
Therefore, agb provides its own HashMap and HashSet implementations which are optimised for use on 32-bit embedded devices which you can use from the agb::hash_map module.
These work exactly like the HashMap from the standard library, providing most of the same API, with only a few omissions for rarely used methods or ones which don’t make sense with the different backing implementation.
Allocators
By default, all allocations in agb go into the more plentiful, but slower EWRAM (Extended Working RAM).
EWRAM is 256kB in size, which is normally more than enough for even a moderately complex game.
Reading and writing to EWRAM takes 3 CPU cycles per access, so is fairly slow however.
If you have a collection you’re reading and writing to a lot, you can instead move it to the faster, but smaller IWRAM (Internal Working RAM).
IWRAM is only 32kB in size and is used for the stack, along with some high performance code, so you should be careful with what you put there.
However, it does only take 1 CPU cycle to read or to write to, so it can be noticeably faster to use.
To allocate in IWRAM, use the new_in() methods on Vec, Box or HashMap.
use agb::InternalAllocator;
use alloc::vec::Vec;

let mut v = Vec::new_in(InternalAllocator);
v.push("Hello, World!");